Disclaimer

"Some of the products used on my blog may have been provided by the vendors mentioned in my posts."

Thursday, 20 June 2013

Hide Out


This photo was taken of me in a large hole in a tree in Trewidden Garden, Cornwall.  


The story behind this picture is that all my boys are now just getting taller than me, so have very kindly taken to referring to me as a 'Hobbit'!!  We found this tree and they decided it was a Hobbit Hole so I got inside it.  


Unfortunately for me, a very large bumblebee had also decided this was a great space so shortly after this photo, I was jumping up and out of it's way!!


I started the page by stitching a couple of fluid lines around the paper.  I then created a painted effect reminiscent of the stripy tree bark and once I added my circular photo, I applied green modelling paste for the mossy ground and continued to blend out the photo into the background with acrylic paint.

I added some honeycomb stamps and the butterflies and script before flicking acrylic ink around a bit!

I carefully stamped some texture from a Tim Holtz stamp giving an impression of random flowers before adding my foxgloves which I painted with Neon II watercolour crayons.

The hand is by Tim Holtz as are the butterflies in the centre. The free flying butterflies are by Lost Coast Designs.

I stamped and cut out my little bird (different colours) and added the felt stem, flowers and button.  The plate label at the top was die cut from grungeboard using an Alterations bookplate bigz die which I applied Green Gold InkaGold to for a metallic look.

I am entering this layout into the 
Scrap265 June Sketch Challenge 
Country View Crafts Challenge 4 - Die Cuts.  

  
I think I will also pop it into Our Creative Corner as a second entry in their 'Recipe' challenge (it's a really good challenge!) as I have used lace in my moss, metal brads and inks, paints & more so it definitely qualifies!!

Have a great week and thanks for visiting! 

xx


Tuesday, 18 June 2013

Busy Bee


I created this page using a kit I was supplied with by Scrapbook Magazine.   I've never really gone for kits but I found that I really enjoyed using it as I had to focus on the best ways to use the various elements and how I could adapt them to suit my style.   For this project,  I was allowed to add other things but obviously the page needed to represent the kit so I tried to limit myself from a total stash raid!!

I added painted swirls to the backing paper and then heavily distressed the second paper using paints and inks and adding bits of vintage paper.


These lovely bees are by Lost Coast Designs.  They are a bit of a fiddle to cut out but worth the effort. I stamped them on vintage music paper before dipping them in beeswax - highly appropriate!


I used FlitterGlu and Copper Thunder gilding flakes with my honeycomb stamp to create their homes - lol!


I created my heart from some wired twine from the floristry wholesalers and added some acrylic paint to distress it.

The large letters are by Ten Second Studio which I embossed and painted with Stewart Gill paints.  The smaller letters are by Graphic 45 which are also embossed and distressed with paint.   

The pin and lace are from the kit.

I'm really pleased with the way this page came together as the colours really bring out the copper in Seb's hair and it's a rare shot of him standing and thinking and he's using running and darting!

I'm entering this page into the Creative Corner 'Recipe' Challenge - I used Lace, Metal and Paints.

Have a great week and thanks for popping by ...

X

Wednesday, 5 June 2013

WOYWW 209!


It's Wednesday already so time for another peep at my workspace.  If you are new to this weekly snoop, pop over to Julia's blog at Stamping Ground and you can see all the links to everyone's desk.  Then you can spend a nice evening hopping around the planet looking at what we are all up to!!  Fun!!

Have to say my workdesk has been rather boring of late - all work and no play is making this girl rather dull.   But not so dull when the pay hits my bank account - then it all seems worthwhile!!

Sadly my neighbour's wife died suddenly a couple of weeks ago and I have been trying to support him.  He is 91 and such an interesting man.  He was involved in the D-Day landings and many other wartime battles and we have had many interesting conversations about the war and loads of other topics over cups of tea and coffee and if I'm lucky, a "ginger doodle" on the side (a scrummy biscuit which he makes himself!).  It makes me sad that I never spent more time with him when his wife was alive.  She had alzheimers and so was not great company for him although he was absolutely devoted to her and they had been together for 70 years.  We have always had little chats over the fence but I could have got to know him better and enjoyed what we have now a lot sooner and helped to prevent times of loneliness for him.

Anyway, on to the desk ...

I have been completing a scrapbook page about my youngest son.  Well, despite being a triplet he is still the youngest by 1 minute!!  I was supplied with a kit (can't say too much about it as it's due for publication next month) which I had a free rein to use how I liked.  I made two pages for the magazine and let them select the one they wanted.  This one was sent back to I'm free to put it online.    I did a bit more fiddling with it, adding a bit more painty bits so later on I will put a post online showing the details.

Have a great Wednesday everyone - I've got to get back to work which is hard as the sun is shining and the beach hut is tempting me!! 

xx


Tuesday, 4 June 2013

One for the Men


So it's Tuesday again and that can only mean one thing ...  It's time for a new Try it on Tuesday Challenge!!  This week we are focusing on creating for the men in our lives - and that doesn't have to be for Father's Day, it can be for any occasion. 

We are very kindly sponsored by Dilly Bean of sillydillybeans.blogspot.co.uk who have provided us with some great digi stamps.  If you would like to be in with a chance to win some digi stamps from them, just get creating and make sure you link back to us in your blog entry and only enter your piece into a maximum of 5 challenges (including ours).

This great robot caught my eye so I transposed him onto Ranger metal tape in three sizes and used a metal tool to create the rivets down his centre.  My tag was coloured with broken china, tumbled glass and dusty concord distress stains over which I then added picket fence and brushed pewter. 


The whole tag is embossed with cogs (didn't really show in this photo) and then I also added some more cog imagery using masks and DI.  I added a few random splatters of arcylic ink in prussion blue and some circles stamped with pewter distress stain.


I wanted some more metal elements and found these silver metal rings in my stash which I remember buying in a bead shop at The Custard Factory in Birmingham.  Perfect.  I also found a great bead to go around the eyelet which I also got from the same shop (can recommend their selection if you are ever in the Birmingham area!)


The ribbon is dyed with stormy sky and pewter distress stain and I couldn't resist some springs coiled from silver floristy wire to finish it off!!


Hope you are feeling inspired to join in this fortnight.  Pop by the other DT girls' creations as they are fab!!

X

Wednesday, 22 May 2013

WOYWW 207


Oh my goodness, I can't believe it's Wednesday already and time for WOYWW 207!!

I was very lucky to have been offered a job at the beginning of the year with an Interior Design Company.  This week we are busy getting a show home ready which great and I am learning so much.  We had ordered loads of styling pieces but the client had purchased a glass dome and we needed something to go in it.  I couldn't resist and volunteered straight away!

 
Yesterday I went to the florist's wholesalers to see what I could find.  I had already got an idea and needed driftwood but I found that they don't stock that and there's no time for an online order.  

Slight panic set in as the kids needed collecting from school and I needed a new idea fast!


I had a quick look around and grabbed a few possible options before dashing off into the school run traffic (always a good space to develop ideas as there's nothing else to think about!)


I decided to use an orchid stem and so needed to secure it to stand upright.  I used oasis which I needed to hide so firstly I covered it in a lovely brown web-like ribbon I had found.   I had also bought a beaded wire collar (designed to be used to make a posy) so I cut it apart and re-invented it to make cover my oasis.


The butterflies are stamped on old dictionary paper and the wire was sandwiched between then so they have dimension.  I curled the wires using my Fiskars Curly Thing (technical term - LOL!) and arranged them in amongst my orchid stem.


 Finished.

I'm really pleased with it but this morning is the moment of truth.  My boss gets here in 1/2 hour so we can head off to the house and finalise everything and so I have to hope she likes my creation ...


Have a great day everyone and happy snooping around everyone's desks.  I'll be doing my fair share when I get home later on today!!

xx


Tuesday, 21 May 2013

Seagull


Our new challenge at TioT is On the Wild Side (featuring Animals of Birds).  I love this one as it's something a bit different - gets your creativity all fired up!

I am still exploring how far I can go with drawing and I wanted to do a page about gulls ...

For the first 30+ years of my life, I lived in-land and only came to the beach on holiday.  I remember sitting in the back of the car with my brother waiting to be the first to see the sea.  The excitement of that stays with me.

We moved to Poole a few years ago and now live next to the beach.  Seeing the sea each day still gives me a thrill and when I am in my garden and a gull floats above me or stands on the roof calling (as they do!) it reminds me of where I now live and how much I love it here.

So this was the background inspiration to my page.

I started by drawing my gull and then I sketched in the land.  I stamped some elements here and there and some fish in the sea (hard to see in the photo) before using gelatos and watercolour pencils to colour my page.

One of the most fun parts was painting waves in water and then feeding acrylic ink into the water - it just spreads out in the most lovely way travelling along the watery paths you create.  Amazing to see!

I spent some time getting the journalling right and then used a stylised text to handwrite it.

The finishing touch was some drizzles of clear tar gel which I coloured with acrylic inks for some texture. 


Thursday, 16 May 2013

Keep Your Heart Open

For those of you who came for a desk snoop yesterday as part of WOYWW 206, they will have seen this page in progress.

I started this page at a class, continued it at home but then left it to one side whilst I deliberated what was missing.  Yesterday I decided that it had to be finished and to crack on with it no matter what!  So, now I'm happy with it and I can pop it on my blog for everyone to see - yeay!!


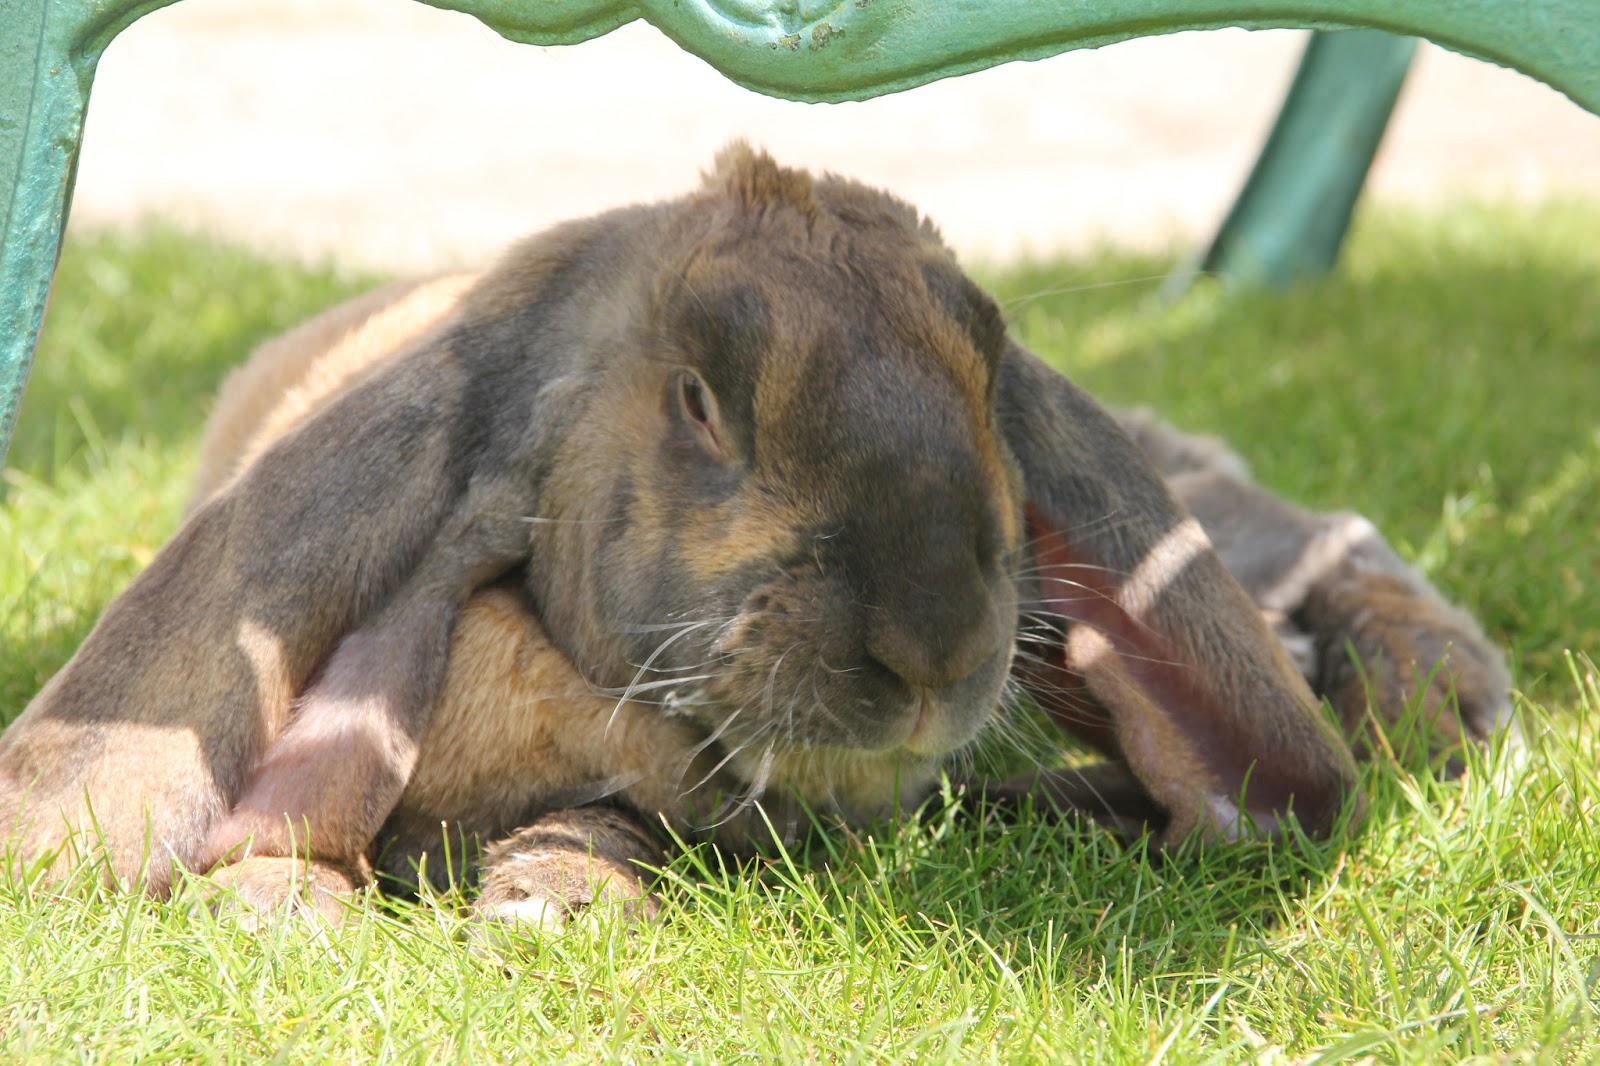
The inspiration for this page was my big bunny Bruno.  
 

Petie
We got our first English Lop, Petie, in September and as soon as I saw him I loved him.  He was the most gentle rabbit and he loved to be held.  Sadly, he died on the day we returned from our holiday at Christmas and we were really sad.  

Bruno
I went back to the breeder to get another big rabbit and I chose Bruno.  However, its always hard to open you heart to a new pet when you are missing one you just lost but he's won me over with his gorgeous personality and kind nature.  


I decided to draw a stylised version of him and colour
him in the distress inks.


Relaxing in the garden
The background was created with dylusions spray inks and stencils.  

To be honest, I've shied away from the spray inks as they are quite messy and my workspace is rather small with my computer, carpets and white blinds to consider (not exactly ideal!!).  However, for this page I flooded the paper and then splodged it down on my craft mat and it was such fun that I'm actually keen to give it another go!  The only problem is that now the edges of at least half my new art journal are red!!!

I added quite a lot of texture stamps and other bits and bobs to create background interest before sitting my rabbit on some old sheet music, tinted with Distress Ink.

I cut my heart and added some wings and doodling and then finished the page with the paper banner edges and the title.


Investigating the camera


I am entering this page into the Craft Room Challenge to stamp your own background and also as a new entry in the Creative Corner blog as it's Anything Goes so my rabbit should be OK over there!!

Have a great week whatever you are up to.

xx

Wednesday, 15 May 2013

WOYWW 206

So this is my first time going WOYWW.  I don't know why I've never done it before as I've seen so many of you all taking part but anyway today's the day and I'm jumping in!!

So, here's my desk.  


Having nosed at some of the other desks, I'm a bit nervous as some people have scarily tidy desks or ones covered in heaps of lovely papers and scissors which still look great.


Oh Dear! 
Mine doesn't fall into either of those categories - oh dear!  You can't see it in this photo (so here it is on the left in all it's glory!) but I have covered my desk with a sheet of old lining paper as I am so messy.  This lets me scribble notes on it and also not worry about over spraying my inks and paints.  I should confess at this point that I've only starting to do this now that my white desk underneath is no longer white so guilt led me to trying to mitigate the problem.  Ever heard of the saying "shutting the door after the horse has bolted?" Oops!

So this week I am continuing on my Art Journal journey and embracing drawing. The workshop I did with Kate Crane  got me thinking about not being afraid to draw and I then watched a great video on u-tube by Vivian Sung Soon Keh.  I loved art at school and I really want to get back to drawing and painting and my journal is a great place for this.


This page is not yet complete and ready to show (hence I've left it partly covered) as something is not quite right.  Am I the only one who gets a project 95% done and find the last 5% the hardest?  I don't want to spoil it but know I have to be brave and add more.  I am experimenting with some old papers for this page ... have to see whether that is what's needed or else it back for a re-think!!

I have been using my gelatos and watercolour pencils on this project and also on another that's ready for my DT slot next week and I am really enjoying myself.

Have a great week everyone and thanks for stopping by my desk! 

xx


Thursday, 9 May 2013

Home is Where the Heart Is


This is the first page in my new art journal.  I started it at my recent day at the Stamp Attic (well done Wendy for organising and hosting) which was taught by the super talented Kate Crane.  I  had a great day which sped by far too fast but it got me started with my new journal and now I'm keen to get time to do more.

I really enjoyed the freedom of the journal and creating whatever I liked with no colour or style restrictions.  Once I got home, I put the finished touches to it with the stamping, border and wording.  Got to try to build on this experience and do more ...

x

I am entering this into 'Anything Goes' at Fashionable Stamping.  

Tuesday, 7 May 2013

Butterfly Card


This fortnight's challenge at Try it on Tuesday is Feminine & Fancy.   

I  spent quite a lot of time thinking about this one and how I would interpret it but now that Spring appears to have finally arrived, my thoughts are definitely with outdoors and spring flowers so I decided this would be my take.

Talking of Spring ... slightly irrelevant to the post ... but has anyone noticed how blue the sky is this year.  It is amazing - just SO blue it's almost violet.  


Anyway, back to my project!  


I used a sheet of Rue 88 by Prima for my background, over which I stamped and white embossed text from the Papillon stamp set. 


I cut my banner and used a scallop punch for the edge before stamping it with some vines.  The central area was stamped with the lovely dog roses and cut out.


I tinted the background with a diluted lemon gelato to soften the paper tone.


All the stamped images with watercolour pencils which are one of my current favourite things!  I have had them for ever in my draw and hadn't realised just how great they are to use and how they give such a soft but controlled effect.  I finished off with some diamond glaze on two of the blooms.  All these stamps were by Prima's Build-a-Frame set.


The butterflies (Unity)  & bee (Stampotique) were also coloured with watercolour pencils.  I attached them with 3D silicone glue for some dimension.


Hope you are feeling inspired to join in with the fun now that we are getting our daily dose Vitamin D from that lovely sunshine!!

I am also entering this into the Faber-Castell Mou Challenge  as they want something inspired by gardens and the Anything Goes challenge at Our Creative Corner. 

xx

Sunday, 5 May 2013

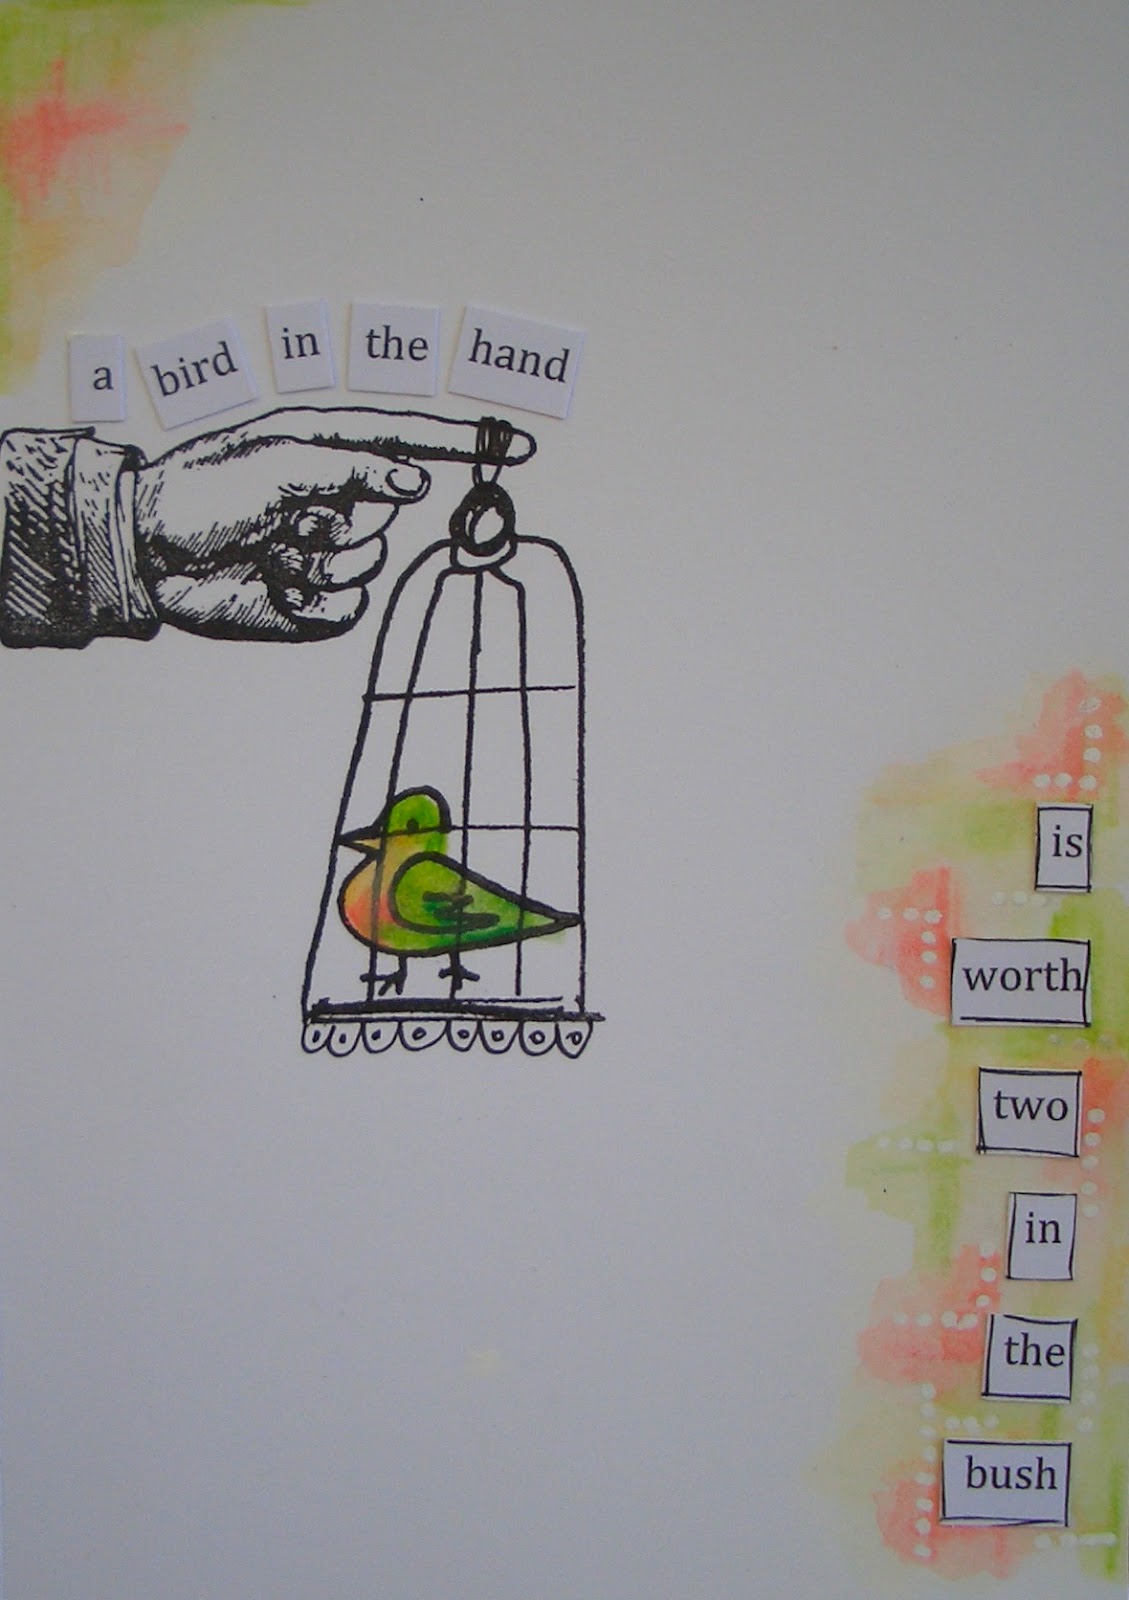
A Bird in the Hand ...


I just bought this stamp set by Stampington & Co with the most gorgeous bird cages and was keen to get them going!  I saw that Artistic Stamper's current Challenge is Clean and Simple so I set about creating a small card for this.

I used watercolour pencils for my bird and the corners and the rest is self explanatory ... simple eh?!!

Fitting this post in quickly as the sun is shining and there is lots to do in the garden.

Enjoy your bank holiday weekend whatever you are doing!

x


Saturday, 4 May 2013

Published!


Well, I've had to keep this quiet for some time, but am pleased to announce that following on from being a Runner Up in the Scrapbooker of the Year, I was asked if I would like to join their Design Team and be their Featured Artist in May.

After not a lot of thought (LOL) I jumped at it and got to work on 4 layouts for the May edition.


I thought I was getting a double page spread, but to my surprise, I had 3 whole pages - WOW!! I feel really elated to have achieved this goal and am looking forward to my role as part of their Team.

Here are the layouts in better detail:


Hope you are all having a great week and the sun is finally shining.

x


I thought

Monday, 29 April 2013

Tulip Bookmark


Today it's my son's 15th Birthday.  It's obviously a great day for him but it's always really special for me too as he was my first child and as corny as it sounds, it just feels like I had him yesterday.  I can't believe I'm a Mum to a 15 year old!  ( Sure all you Mum's out there know exactly what I mean!!)

His birthday list is very short this year which means he only has a couple of gifts to open and the remainder of his budget he is saving.  This is great as he has money for things he may want later in the year but it's not much fun getting an envelope of cash is it? 


However, the one thing he did want was a bookmark.   

He is an avid reader and his mulberry paper bookmark we bought in Thailand some years ago is almost worn out.   

He saw a really cool one make from recycled electronic boards at the Natural History Museum but it was a bit chunky to sit nicely in a book.  So, he asked me to make him one.

I did a class at the weekend at the Stamp Attic with Kate Crane which was fab.  She got us drawing and to my surprise, I found I could draw better than I thought. So I decided to base the bookmark on 'Tulip' who is Max's rabbit which he has had since he was a tiny baby and which has been his favourite soft toy his whole life.

Tulip has always been the special toy and he has travelled the world with us.

My regret is not knowing this in advance as I would have loved to have thought to take photos of him on our travels as it would have made a great album.

I created my background using dylusions inks and stencils.  Added some stamping and painty bits & pieces before covering most of it up!!!  My rabbit was drawn and cut out and painted using distress inks.


I wrote a note from Tulip on the back which will amuse Max and then I ran it through my Zyron machine to protect it and make it last a bot longer!  I punched a hole so I could add the tassel and it's all ready.

I've yet to make his card and cake so better press on!!

Have a great day ...


 I am going to enter this bookmark into FSC Challenge 'Sentimental'.  When I popped by and saw their challenge, I thought this must be meant to be as it couldn't really get more sentimental for me (it nearly made my cry writing the note on the back as it brought back all the times he was a little boy!!) Oh ... I think I need to 'man-up'!!

x

Thankyou


Well, first off a big THANKYOU to Avril for thinking of my and my little blog and nominating me for this award.  She is one of my fellow DT members at TioT and it's really touching when someone thinks of you and tries to help you.  

This award is designed for blogs that have less than 200 followers.  Once the award has been accepted, the idea is to pay it forward to 5 other blogs that you like to read and follow and hopefully encourage others to visit, read and follow them too.

To accept the award, you have to ...

  • Thank the person who gave it to you and link back to their blog
  • Post the award on your blog
  • Give the award to 5 others Bloggers with less than 200 followers and leave a comments on their blogs telling them they've been nominted.
I have just realised that most of the people I follow have over 200 followers so I couldn't nominate them, which has been a bit of an eye opener for me!  I probably need to post more often but I often make things that aren't linked to a challenge so it's hard to see how anyone will see them so I don't post them.  I think I'll just post them anyway and see how it goes!!  

Anyway, I am nominated the following 3 people (hope that's allowed?).  They all make lovely things so I hope you take a few minutes to pop over to them and consider becoming one of their followers.

Suze
Kaz
Cathy


Alexa 

x

Tuesday, 23 April 2013

Balloons


Our challenge for this next fortnight at TioT is Inventors, Inventions and/or Steampunk.  

I have a fascination with hot air balloons and so this challenge allowed me to go to town with lots of different ones floating about in the sky.

I started by stamping my card with some keys and my dream stamp to create the background.  I converted a photograph taken on my recent trip to Cornwall into monochrome and then downloaded my hot air balloons from the Dover Book of Old Transportation onto a sheet of acetate.  I coloured the balloons with Sharpie pens and used Helmar 450 to fix my acetate to my image.

The large balloon was stamped and coloured with pencils and I used some red crystals to highlight the strings.  The rosette was cut using an alterations die to which a couple of cogs and ribbons were added.


Check out the rest of the TioT DT entries as they are really inspirational and will hopefully get your creativity fired up to join in the fun!!


Genuinely Jane Studios are our sponsors for this challenge and they are very kindly giving a Gift Certificate of $25.00 to the monthly winner.  

Remember you can only enter your work into 5 challenges including ours if you want to be in with a chance to win the prize.


Genuinely Jane Studios produces dozens of different styles of natural birch wood albums and mini-albums for scrapbookers, mixed media artists and altered artists. We also offer complimentary products including paints, inks, adhesives, glitters and much, much more.

Have a great week ... the sun is shining here in Poole and the sky is blue so maybe the summer is finally here?!!

x

I am entering this into the Colour Challenge at SSSS  as kindly suggested by Terry!