Disclaimer

"Some of the products used on my blog may have been provided by the vendors mentioned in my posts."
Showing posts with label Stampotique. Show all posts

Tuesday, 24 September 2013

A Bit More JOFY ...


These flowers are just gorgeous!  I love cone flowers in real life and have them in my garden but it is a constant battle to keep the plant, let alone get a bloom as they are high on the list of favourite foods for slugs!!

What I have found with these stamps is that they stamp beautifully every time and they seem to look good coloured in any combination which is a great as it takes the pressure of finding shades with will work.

I made this card for my daughter and it was the last of the 3 cards needed for my triple team.  She's a very girly girl so I decided that pink with crystals would be a perfect combo.

I decided to combine her card with my DT piece for our new challenge at Try it on Tuesday, which this fortnight is 'Going Dotty'. 

I started by using crackleglaze over bubblegum acrylic paint on the corrugated card before adding the white top layer.  I am fascinated by the speed it crackles up - the effect is so cool.  I love that you can make bigger or smaller cracks depending on the paint thickness.  
I kept my crackles quite small and I wiped a few areas to expose more of the pink.


I coloured my blooms with DI using the pads with water and also the distress markers. 

The dotty background was make using more DI with a great circular mask.  I then used a new stamp by Stampotique to add all the flower words.

It would be great to see all your dotty entries this fortnight so get your spots and dots ready and join in with this fun challenge.

x

Tuesday, 7 May 2013

Butterfly Card


This fortnight's challenge at Try it on Tuesday is Feminine & Fancy.   

I  spent quite a lot of time thinking about this one and how I would interpret it but now that Spring appears to have finally arrived, my thoughts are definitely with outdoors and spring flowers so I decided this would be my take.

Talking of Spring ... slightly irrelevant to the post ... but has anyone noticed how blue the sky is this year.  It is amazing - just SO blue it's almost violet.  


Anyway, back to my project!  


I used a sheet of Rue 88 by Prima for my background, over which I stamped and white embossed text from the Papillon stamp set. 


I cut my banner and used a scallop punch for the edge before stamping it with some vines.  The central area was stamped with the lovely dog roses and cut out.


I tinted the background with a diluted lemon gelato to soften the paper tone.


All the stamped images with watercolour pencils which are one of my current favourite things!  I have had them for ever in my draw and hadn't realised just how great they are to use and how they give such a soft but controlled effect.  I finished off with some diamond glaze on two of the blooms.  All these stamps were by Prima's Build-a-Frame set.


The butterflies (Unity)  & bee (Stampotique) were also coloured with watercolour pencils.  I attached them with 3D silicone glue for some dimension.


Hope you are feeling inspired to join in with the fun now that we are getting our daily dose Vitamin D from that lovely sunshine!!

I am also entering this into the Faber-Castell Mou Challenge  as they want something inspired by gardens and the Anything Goes challenge at Our Creative Corner. 

xx

Thursday, 13 December 2012

Wicked Wednesday ATC


I don't usually do ATC's ... actually that's not true ... I have never done an ATC before in my life!!  I had to google to find out what size they need to be!!  Is that bad? 

Anyway, I might not be an ATC veteran but I am a big fan of Stampotique and I follow their blog and marvel at the gorgeous work that their DT create.  My kids buy me the small stamps for mother's day and my birthday which makes them extra special and they always stamp so beautifully they are a joy to work with.

I have been focusing on other avenues recently so haven't had chance to enter many of their challenges but I checked out the blog this week and found one based on Wings so I really wanted to put a mini project together and join in the fun.

So, I turned my tree (Daniel Torrente) on its side to create a branch for my little tired angel (Jill Penney) to rest against under the stars. 

I didn't want to cut and mount my branch so I stamped it in archival and then carefully created by background around it with a combination so water, distress stains, a heat gun and a paintbrush.  The stars are created from two sizes of crystals and the words are  Stampotique.

I coloured my branch with pencils and mounted my angel carefully with silcone gel  before adding some final border lines around the edge.

Hope you like her! x


Wednesday, 28 November 2012

Pumpkin Carving


For those of you who regularly visit my blog this page will be a bit 'deja vue' and you are right, this is second time lucky for my pumpkin carving page!  


I've been working on creating blended layouts recently where my photos fall into the background so the page becomes like one big canvas rather than having elements layers onto the page.  It's quite a tricky and time consuming process but I love the end result.  However, in trying to do the same with these photos, I realised it is almost impossible with multiple photos with very different colour schemes.


So to cut a long story short, whilst I thought the end result was not the best I've achieved, I thought it did work ok.  However, the photograph exposed all it's weaknesses and when I asked my family for their honest feedback ... well it wasn't exactly great!!  So, I've dismantled it, binned it and removed the post (my mother always told me to leave my disasters in the kitchen so I'm metaphorically doing the same with that page!)

This layout is more along the traditional lines but it does work better on this occasion - I hope.  It's not so much fun scrapping the same photos twice and I'm ready to move along, so I'm off to see how my next blended creation is going to turn out!

Hope you are all having a creative week ... x


Thursday, 11 October 2012

Fly


I have just discovered Fran-tage by Stampendous and I LOVE IT!!  The shabby embossing enamels are beautiful and as for the mica fragments ... well don't get me started!!

I wanted to have a play with them straight away so I used some of the corrugated card from the box my order arrived in as my background.  I started by picking the cardboard apart to expose the 'ribs' before using paint dabbers over some of the background.  I wanted to create two big splodgy areas so I tried melting the shabby enamel in a melt pot.  However, I found that I lost all the colours and glitter and ended up with white.  So I poured this onto the card which allowed me to re-adhere more embossing enamel over the top.  I also tried heating it from below but as the card is quite thick, the heat doesn't really get through sufficiently to get the melt going and I was worried I would set fire to my project before I'd even got going!!  When the enamel was still wet I added the mica flakes and beads.

The birdcage is cut from Tim Holtz Kraft resist paper which I then inked and made little dangly pendants for the bottom.

I cut the birds with my cricut and stuck them onto wire and allowed to dry.

The flowers are made with crepe paper which I stamped with text and spritzed with glimmer mists.  Once dry, I cut individual petals and stuck them around the centre on a cocktail stick.  Creating them like this allowed me to make big soft and shabby blooms which I have fixed by pushing the stick through the background, gluing and trimming.

I painted the old watch face with Viva Gold metal paint and used PVA around the edge before dipping it into Cosmic Vintage Mica Flakes.  The words are a Stampotique stamp which I stamped and embossed in black before embossing the ends with Fran-tage and mica flakes.

  The card is double mounted onto Lost and Found papers. I have torn, distressed, curled and inked the first layer and I embossed the back layer with music before inking the edge with black soot and tattered rose.  I also added some gold rub-on with my finger to accentuate the embossing.

I love the soft summery shades the Fran-tage adds - hopefully it will remind me of summer now we are getting grey rainy days :(


I have entered this into the following challenges:

Crafty Mess - 19th Challenge: Anything Goes
Craft Pad - No. 191 Vintage
Stampin' for the Weekend - Challenge 18: Feeling Floral
That Craft Place - Make you own Background
Totally Gorjuss - Punch and Die
  Hope you are having some sunshine wherever you are ... x


Wednesday, 3 October 2012

Magical Card


A little card featuring doodling and a magical castle which I've made just for fun.  I hadn't used this stamp in a while and fancied a bit of a magical moment ... so what better thing to do?!! 

The background was created with Dylusions inks and white Indian calligraphy ink.  The spotty border was stamped using a Differentcolors stamp which I cut down to a narrow size before doodling around the edge.

I coloured the castle with distress markers which I love (one of my best recent purchases!) and I finished the card with a Stampotique flower stamp to which I added silver sparkly centres.

Hope your day has had some magic too ... 
 
x

Tuesday, 2 October 2012

Woodland Bird House


I bought this MDF birdhouse last week at The Big Stamp Show held at Alexandra Palace in London.  It is actually a money box with a slot in the roof, but as I have no use for that, I covered the slot when I made my new roof!

The roof is covered with Ten Second Studio metal which I have embossed and sanded.  I wanted to add a decorative roof edging so I used Art Parts by Studio 490 which I painted and stamped.

I altered the entire birdhouse to look like white peeling weathered wood and I stamped leaves and flowers in chalk ink using some gorgeous new stamps by Differentcolors who are based in The Netherlands.  A few Lost Coast butterflies finished the background.  The picket fence is an alterations die which I painted with dabbers in two shades.

The birds and branch are by Maya road.  I painted the branch with acrylic paint and covered the birds in old text before tinting them using distress markers.  I added a small crystal for an eye and part embossed the larger bird with some Golden Sparkle embossing powder by Cosmic Shimmer which I got at the Show.  The little nest is from The Range;  it came in a pack of 6 around Easter time and I tinted the eggs with alcohol ink.  The butterfly is a download from Divas D'Este.

The final addition was the sentiment which is a Unity Stamp by Donna Downey. 

On this side, I cut some tattered florals in grungeboard and coloured them with distress inks before overstamping them with patterns.  The stems are made from a coffee spatula (thanks to Costa Coffee!) which I tinted with Walnut Stain distress.

The bee is  Stampotique stamp by Jo Capper-Sandon.
For the other side I stamped and cut out a tree by Stampotique and sat my crows, also Stampotique, on its branches.

It was really fun making this house, which is for my new studio.  I'm entering it into 'Lots of Layers' challenge on Try it on Tuesday, into 'Birds, Butterflies & Bees' challenge with The Stamp Man and also Challenge 3 on Anything But a Card

Have a happy day ...  x


Wednesday, 25 January 2012

Fabulous


Well, how lucky are we this month?  At Gingersnap Creations, we are being sponsored by Stampotique which I am SO excited about as I love their stamps (and have a drawer full of them which are my guilty pleasure!!).

This week is Gorgeous Greens and so I immediately decided on one of Janet Klein's gorgeous flower girls.  I have used Hiya Cinth who is just lovely with her dainty little shoes, big green leafy collar and immense hair ... or is it a hat?  Either way, I love her!
 

I've created my piece on canvas using watercolour for the background and loads of water.  All the stamps are by Stampotique and the great thing about many of their stamps is that you can use them either way up to create different things.  My glittery flowers are made from a banner of dangly hearts but they work just as well in Hiya Cinth's garden I think.


Why not see if you can feel a little green -
it's better than feeling blue after all!

x

Saturday, 21 January 2012

Altered Jars


This month at Gingersnap Creations it's all about getting organised and our focus is on using scraps which I'm sure you all have LOADS of if you're anything like me!  I have done a tutorial on using scraps with stamped images and also using them with cutting machines.
I decided to alter a couple of jars which I had left after Christmas (so they were scrap also!).
If you'd like to find out about this technique, go over to the Gingersnaps website for full instructions.


Thursday, 1 December 2011

Every Life ...


I made this card for my brother's birthday.  Cards for men are always a challenge and my brother is no exception.  He's quite an 'off the wall' kind of character so I wanted something querky.  I found the image of the flying man and set about putting him into a context.

The line of cottages and tree are new stamps by Butterfly Kisses which I had in mind to make snowy shaker Christmas cards with.  However, they were also great for building this scene ...

I cut clouds from masking sheets and they brayered the background.  I stamped my cottages and coloured them in before fixing then to my card.  The tree and sentiment (Stampotique) were stamped directly onto the background.

I printed my flying man onto acetate and cut it to fit around the rooftops before sticking it down with a little glossy accents.  Voila! My man has taken to the skies for some peace and quiet!!

Hope it brings a smile to your face and also my brother's!

x

Saturday, 19 November 2011

Glass Bead Gel Tags

I have uploaded a tutorial onto the Gingersnap website to show how to make these tags.  

I love playing with messy stuff, and glass bead gel is so exciting!  I actually bought it from an online art retailer without knowing what it was or what I would do with it because it just sounded fun.  I wasn't disappointed as it is gorgeous stuff!


When wet, the gel is milky and the beads are hard to see but once it dries it is clear and the little glass beads are everywhere.  You can spray it with glitter, tint it with paint or spritz it with mica spray.

I decided to use it to create effects in apertures which I cut into large tags.

I made a seaside tag based around this lovely bathing beauty who I downloaded from Diva D'Este.

I created a wavy element at the bottom using the gel.


This butterfly tag has the gel all around the butterfly and is scuplted in swirls.  I decorated the tag with shimmer sprays, masks and paints.  The butterflies are beeswaxed and have idea-ology pen nibs for their bodies.  I used stamps by Lavinia stamps, Lost Coast Designs and Stampotique.


Thursday, 10 November 2011

Halloween Postcard


I am currently doing a postcard exchange with a lovely group of ladies  which is running for 14 months.  We started in June and it's proving to be a lot of fun.  Some months we get to choose what we do and some months the recipient has expressed a preference.  Either way, it keeps you on your toes and it's lovely to see everyone's ideas and work.

For October the preference was bats so a Halloween theme was the obvious choice.  I used distress inks for the background and stamped some patterns into it with water to give a faux bleach effect.  I stamped a crackly pattern over this before adding my main images.

The monastery, bats and spider are by IndigoBlu and the foliage is a stampotique stamp.  The sentiment is heat embossed in vanilla white and then mounted onto purple card which I had embossed.  I outlined the edge in gold and fixed it with 3D silicone glue.

I used glossy accents on my spider to make him stand out.

I am really pleased with the way this card came together ... hope you like it too! 

Spookily yours ... x

Wednesday, 5 October 2011

House of Horrors


A departure from both my normal style and theme but this month at Gingersnap Creations is all about mystery and the macabre in the style of Edgar Allan Poe.

I don't really do horror - the oddest things in my craft room are my Stampotique stamps with their weird faces but I did have this old photo I picked up last year in a secondhand shop.  I think it was taken of an old stage set but as it was so unusual already, I thought I could alter it to make it into my House of Horrors!

It was really fun to create and I had to look far and wide to find bits and pieces which were small enough to use.  

If you are feeling mysterious or macabre (not sure that's good?!!) then why not see what you can come up with and join the challenge!

Keep an eye on the art in whatever you do ...   x

Monday, 19 September 2011

Anybody there?


So I came up with the idea of using Gog Lin - the little goblin stamp which the children bought for me for Mother's Day earlier this year.

I decided to put him under a sea of large blooms which hopefully will appeal to my son's quirky sense of humour (I hope!)

I created the background on a piece of Tim Holtz paper which looked like an old ledger.  I wanted some of the text to still be visible to create a bit more interest so I used a large dry pastry brush (!) with very little paint and brushed the colours out very thinly.  I find pastry brushes great for certain techniques and they are really inexpensive to buy (especially compared to paint brushes). 


The title was stamped using an alphabet by Darkroom Door over which I stamped some script.  I used 3D silicone glue for my little man and my title. 

So that's the final card done ... just the cake to make and all the pressies to wrap -  and whoever thought triplets were going to be easy?!!!!!  xx


Birthday Greetings From Under the Sea


I love these mermaid stamps ... except for the cutting out part!  

This is my daughter's birthday card which I created using alcohol inks for the watery background.  I put a pearl layer over it which doesn't really show up in the photo but gives it a lovely sheen in real life.  I used acrylic paints and a stencil and bottle lids to create the circles.

The stamps for the top and bottom borders are also Stampotique.

So, that's two cards made and just one to go!  At the moment, I haven't got any ideas for the last one so better get my thinking cap on and quickly!!

x

Sunday, 18 September 2011

Rainbow Birds


I recently bought the Stampotique 'Strut Your Stuff' stamp.  One of my sons fell in love with it so I decided to give it it's first outing on his birthday card.  I love their stamps as they always give such a strong clear result and so my birds are strutting decisively across his card!!

I had an idea to give them all large rainbow plumes using alcohol ink which, after a few trial runs, turned out well.  I think they look like Indian Chiefs now which will make him laugh!

Hope you are all having a crafty time - the rain here in Dorset is fairly constant today so apart from stopping to feed my hungry monsters, I'm planning to craft all day - Yippee!  x


Monday, 13 June 2011

For You


House move over - thank goodness!! - so back to a little time to be creative in between sorting the new house out.  

I made this little card for the Stampotique Designers Challenge SDC32: Clean and Simple. 

This challenge involves creating a clean layout with plenty of free space ie minimalistic.  I always admire this look as it seems so simple, but I actually found that it was quite a challenging to create.  Either my layout looked unfinished or I added one more touch and ruined the whole thing!  Trust me when I say that my new bin is testament to this (Uh Oh!)


Several attempts later, I finally got it right and this is the result.  

My little Gog Lin stamp was a present from my children on Mother's Day so it's really got a special place in my collection and this was his first outing!


Hope you all like him ...  x

Tuesday, 17 May 2011

Not Everything That Dives ...


The new mermaid stamps from Stampotique are really detailed (as you would expect) and I just had a play with one when I had a few minutes to spare.

Monday, 2 May 2011

Be Bold


I have entered this card into the sketch challenge at Stampotique Designers Challenge.  This is my first use of this stamp and I really love how beautifully it stamps up.  

I have used the rickety house die from Tim Holtz as my background layer.  I thought hard before buying this die as I didn't want something just for halloween (despite my love of halloween ...  it is only once a year).  I have found that it can be altered quite easily to suite other occasions which justifies its place in my stash!  On this card, I put it into a script embossing folder then painted and sanded it.  Some black glitter and more black paint finished it off. 

I used paint dabbers and white ink to create the background and I painted my Queen with watercolours.

Just hope the Stampotique Team like it!!

Thursday, 31 March 2011

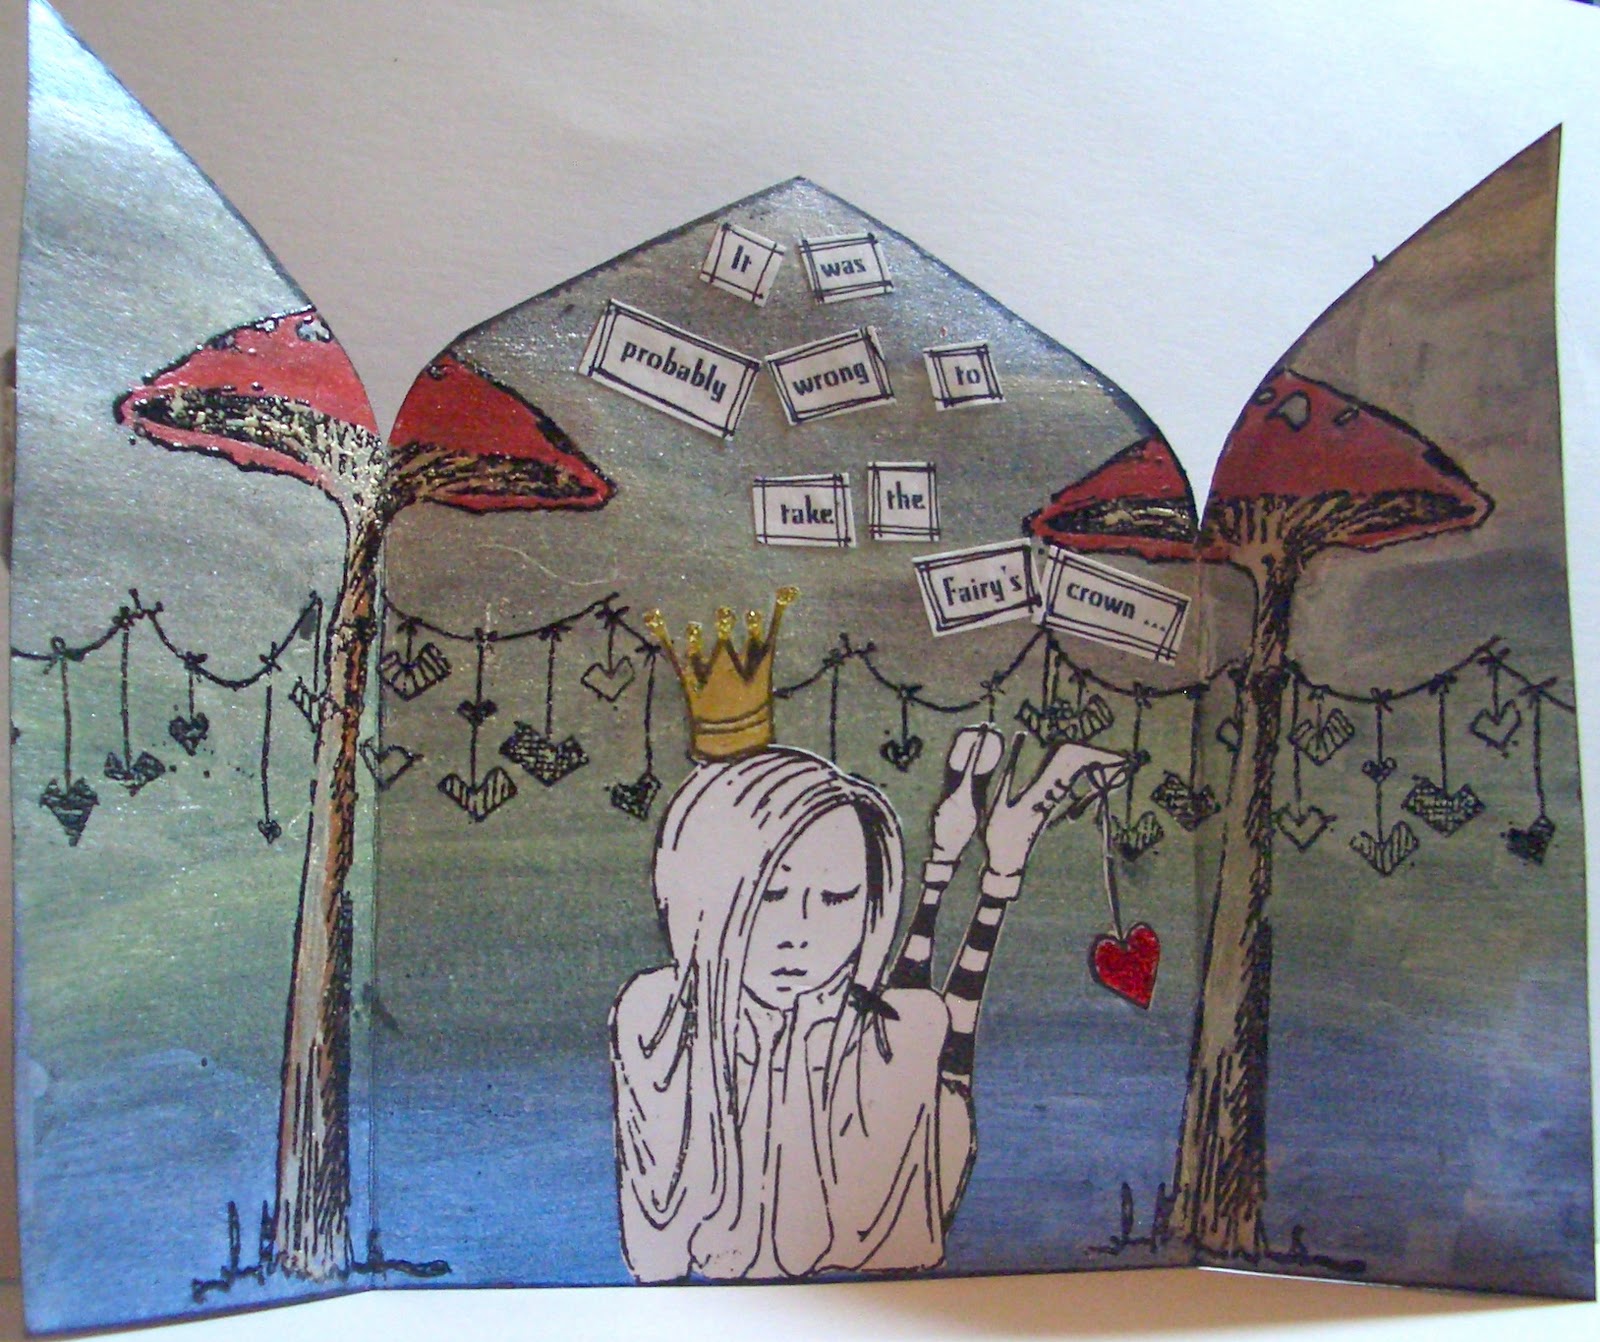
Stealing the Fairy's Crown


I have created this Triptych card for the Stampotique Designers Challenge.  To say that I agonised over it would be an understatement.  The rules of the challenge this week only allow the use of Stampotique stamps and I found it really tough to get any theme. 

Some hours later (having distractedly driven the children about whilst still trying to work out how to meet the challenge), I came up with my design (sorry kids!!).  

I used Artquest paints which are available in wonderful duo and interference palettes as well as pearlescent and metallic.  They blend beautifully and are affected by the colour of the paper you use them on.  However, as they are so soft, they are tricky to work on top of without marking the finish you have created.

I hope the end result captures the fairy world of glimmer and shimmer I was hoping to achieve.