Disclaimer

"Some of the products used on my blog may have been provided by the vendors mentioned in my posts."
Showing posts with label Jo Capper-Sandon. Show all posts

Tuesday, 2 October 2012

Woodland Bird House


I bought this MDF birdhouse last week at The Big Stamp Show held at Alexandra Palace in London.  It is actually a money box with a slot in the roof, but as I have no use for that, I covered the slot when I made my new roof!

The roof is covered with Ten Second Studio metal which I have embossed and sanded.  I wanted to add a decorative roof edging so I used Art Parts by Studio 490 which I painted and stamped.

I altered the entire birdhouse to look like white peeling weathered wood and I stamped leaves and flowers in chalk ink using some gorgeous new stamps by Differentcolors who are based in The Netherlands.  A few Lost Coast butterflies finished the background.  The picket fence is an alterations die which I painted with dabbers in two shades.

The birds and branch are by Maya road.  I painted the branch with acrylic paint and covered the birds in old text before tinting them using distress markers.  I added a small crystal for an eye and part embossed the larger bird with some Golden Sparkle embossing powder by Cosmic Shimmer which I got at the Show.  The little nest is from The Range;  it came in a pack of 6 around Easter time and I tinted the eggs with alcohol ink.  The butterfly is a download from Divas D'Este.

The final addition was the sentiment which is a Unity Stamp by Donna Downey. 

On this side, I cut some tattered florals in grungeboard and coloured them with distress inks before overstamping them with patterns.  The stems are made from a coffee spatula (thanks to Costa Coffee!) which I tinted with Walnut Stain distress.

The bee is  Stampotique stamp by Jo Capper-Sandon.
For the other side I stamped and cut out a tree by Stampotique and sat my crows, also Stampotique, on its branches.

It was really fun making this house, which is for my new studio.  I'm entering it into 'Lots of Layers' challenge on Try it on Tuesday, into 'Birds, Butterflies & Bees' challenge with The Stamp Man and also Challenge 3 on Anything But a Card

Have a happy day ...  x


Thursday, 31 March 2011

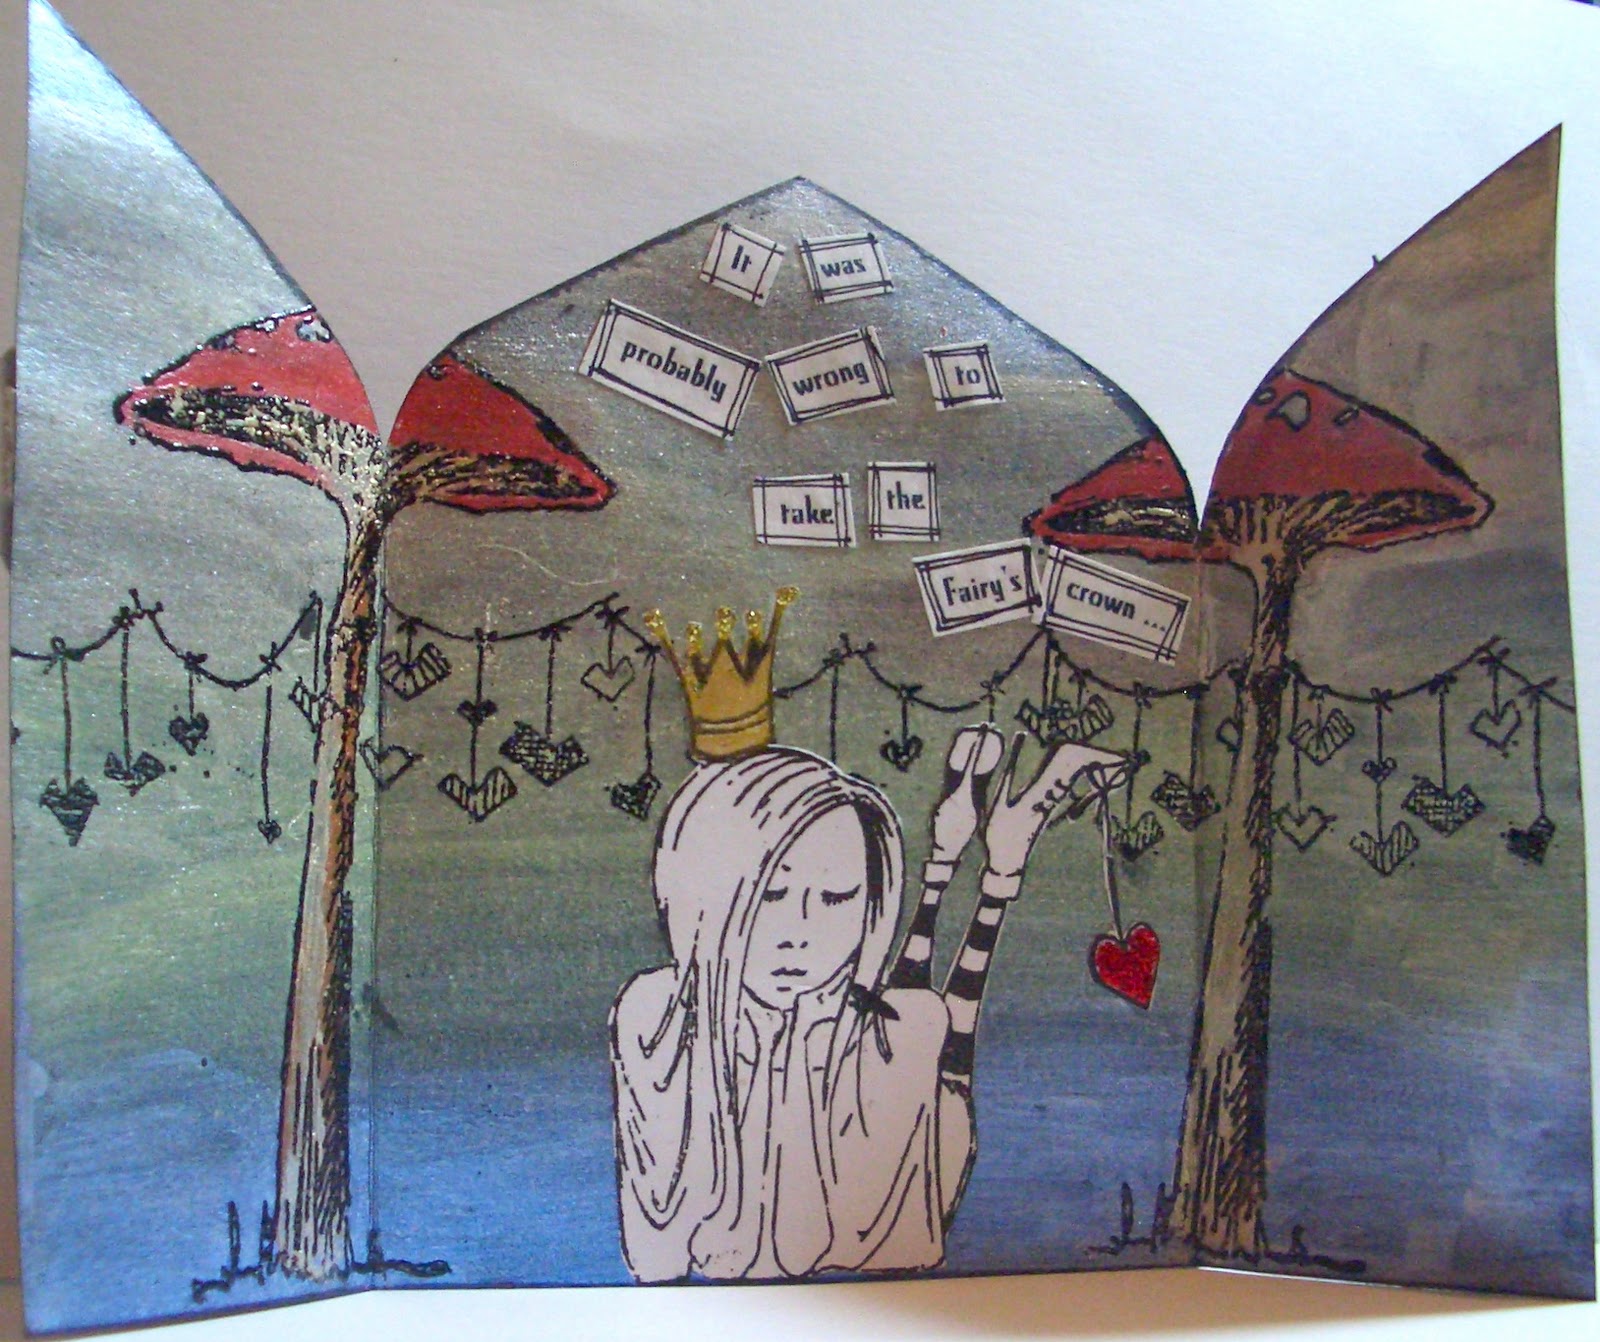
Stealing the Fairy's Crown


I have created this Triptych card for the Stampotique Designers Challenge.  To say that I agonised over it would be an understatement.  The rules of the challenge this week only allow the use of Stampotique stamps and I found it really tough to get any theme. 

Some hours later (having distractedly driven the children about whilst still trying to work out how to meet the challenge), I came up with my design (sorry kids!!).  

I used Artquest paints which are available in wonderful duo and interference palettes as well as pearlescent and metallic.  They blend beautifully and are affected by the colour of the paper you use them on.  However, as they are so soft, they are tricky to work on top of without marking the finish you have created.

I hope the end result captures the fairy world of glimmer and shimmer I was hoping to achieve.


Friday, 25 March 2011

Worker Bee


This card is for the Gingersnap Creations GC93:  Chestnut Challenge - Get To Work.

I watch all the wildlife in my garden as I work and bees are always at work too so they seemed a good starting point.  As I began this  project, the sun was shining and my window was open and a big fat bumblebee buzzed in on his travels so it sealed my idea.

I stamped the background with a honeycomb pattern and inked the edge with distress ink.  The flowers were stamped with VersaMagic chalk inks to give a really soft finish.  The bees are Stampotique  and the large bee is 3D mounted for depth. I painted the wings with rock candy and a little bit of sparkle.

I fixed the title into a metal plate and stamped the works in amongst the blooms.  The task for the bees is the make honey, unfortunately, for most of us, it's to make money!!

Tuesday, 15 March 2011

Spring


This is the first of two layouts I completed at the weekend.  I went to St Ives in Cornwall and spent Saturday with Just Scrapbooking.  I love being able to play with so many different materials and the best bit is having a whole day to indulge in my favourite activity without having to break off to prepare lunch or help with homework!  Also met a bunch of lovely ladies which I hope I will meet up with again.

I took the photo of the children in amongst the daffodils in a Trevarno Gardens last year.  There were so many varieties and they were all busy with their cameras and videos.  I have aged the picture which gives is a nostalgic feeling.

The layout incorporated lots of techniques including using Ten Second Studio alpha set and metal, ferro paints, water colours and stamps.

I used 'Jasmine' and daisies by Jo Capper-Sandon along the bottom of the page.  The background paper is from the new Botanicals range by Prima.

Monday, 28 February 2011

Play the Game


For this layout, I used glimmer sprays and distress inks to colour the backing paper which I had crumpled up to give it that shabby tattered look.  I stamped clocks and script to add to the effect.  I used sequin film and distress ink to make the honeycomb pattern and mounted my two bees on 3D tape to hover on it.

The clock was a die-cut from my stash which I masked and inked before adding the clock hands.  
I made the fold out tag from cream cardstock and used distress inks and stamps to embellish it before adding the journalling and photographs.  I'm not usually a fan of hidden journalling elements but the story behind the photo was quite long and couldn't easily be told in a flat layout.

I wanted to secure my tag with the fasteners that are found on internal envelopes in large companies but despite much googling, they have eluded me.  If anyone knows where you can get these - please do let me know ;)  Instead, I have used Ideology Hitch Fasteners.   

The title was stamped with dotty letters to reflect the honeycomb and the remainder of the title was stamped onto cotton tape and distressed.  I used staples to grunge them up before fixing them to my layout.

Hope you like the end result.

Enchanted Doorways


Since the photo workshop where we worked on photographing fairies (!!)  my childhood fascination with magical elements has been re-awakened.  The stamps by Lavinia Stamps were perfect for capturing this mood as was the large shroom by Jo Capper-Sandon.  The photo is of a fairy door that I took with me when we visited a local gardens.  It turned out to be really hard to place so that it looked 'real'.  

I stamped the large mushroom and masked it before using colourwash sprays and glimmer mists to create the background.  Once dry, I stamped the other elements.

I'm really pleased with how it has turned out. 

Thanks for looking :)