Disclaimer

"Some of the products used on my blog may have been provided by the vendors mentioned in my posts."

Wednesday, 19 October 2011

Never More


The new theme at Gingersnap Creations is the famous poem, The Raven, by Edgar Alan Poe.  The word 'nevermore' features many times throughout the verses and so as a play on that, I decided to split my word up as my poor man is definitely Never More!!!

I used stamps by Tim Holtz and Green Pepper Press to create the grizzly scene and I inked and masked the background with distress inks and dylusions sprays.  A splat of gold acrylic grunged it up a little more before the swirls (In My Words by Fancy Pants) were added.

I used an ideology acrylic chip for the title and a skull charm to finish it off - lovely and creepy!!

As Halloween is upon us, why not see what gruesome images you can find in your stash and join in the fun?!!

Keep craftful (is that a real word - I'm not sure?!!)

x

Monday, 17 October 2011

Apron.ology

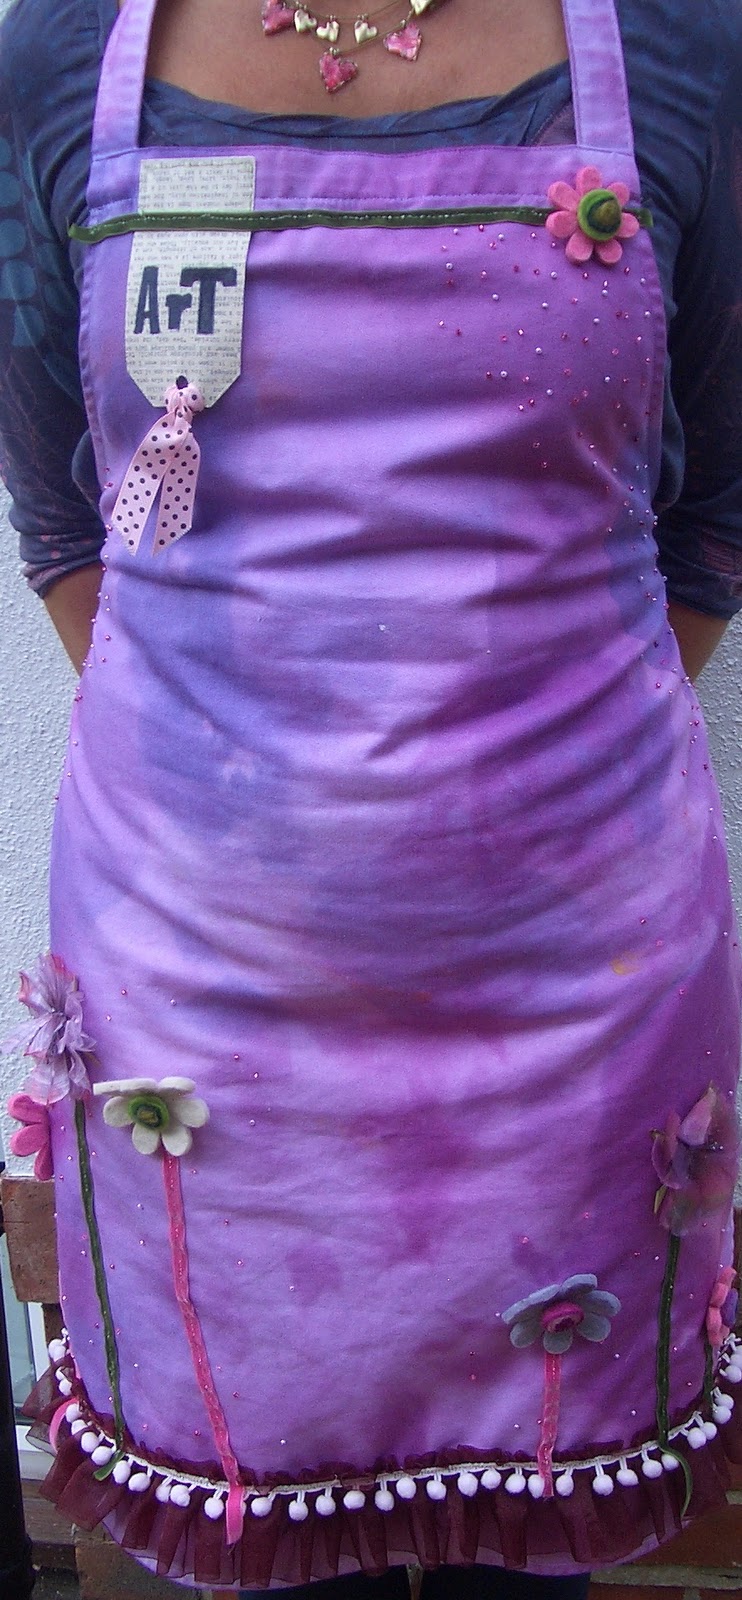
I have been interested in having a go at Apron.ology (as named by Stampington & Co!) for a long time.  Well, actually since doing a canvas album a couple of years ago, which involved me trying to work in harmony with my sewing machine with whom I have  a love/hate relationship (I love it and it hates me!!)

I knew my retreat this weekend would be really messy so I decided that if any time for a new apron was upon me, this was it!!  

I headed off to the shops with an idea in my head and before long I returned with a crisp white apron and various threads and ribbons.  I hung my apron in the garden on our decaying tree house and sprayed it with Adirondack color wash.  I love their colours but I have to say that most of the depth washed out in the first rinse (despite serious heat setting) and my tumble dryer needed quite a bit of remedial work before using on the family wash (thank God the boys' rugby kit is black)!!  However, I was undeterred ...

I did a second spraying and rinse which did increase the depth but I would still have like to have achieved more colour density. 

Once dry for the second time, I got my sewing machine out and sewed all the frill, bobbles and stems onto my apron.  I used metallic thread which looks great on the apron but is a NIGHTMARE to machine sew with as you cannot get it to thread through the needle without removing the needle from the machine and using a threader.   In future (note to myself) DO NOT USE THIS THREAD!!!

The next day I was sat in the hospital with my eldest son who needed an operation so whilst he was in theatre, I sat and sewed the flowers and seed beeds onto my creation.  Found it really satisfying and for a non-sewer, remarkably relaxing!

Despite my mini-traumas with this project, I would recommend Apron.ology as it is  different and fun and the best bit is ... you get to WEAR your ART!!!

Keep crafty (it's the only way!!)  x

Art


I'm really pleased with how these little tags have turned out.  A lovely friend, Lesley, who lives in Canada posted a fantastic tutorial on her blog.  I loved her idea and wanted to make some but we don't have counter top samples in the UK (well not that I could find).  So I got in touch with her and she mailed some over to me - how kind is that?!  

If you want to see how to make these or any of her other lovely projects, hop over to Harmony Road Studio.  The tutorial is a little while back to click here to go directly to it.

I made my tags to give to a couple of good friends of mine who I was meeting up with this weekend.  The images are by Diva D'Este and the beads are Beadazzles (which I love!).

Thanks for visiting and hope you all had a great weekend. x


Wednesday, 5 October 2011

House of Horrors


A departure from both my normal style and theme but this month at Gingersnap Creations is all about mystery and the macabre in the style of Edgar Allan Poe.

I don't really do horror - the oddest things in my craft room are my Stampotique stamps with their weird faces but I did have this old photo I picked up last year in a secondhand shop.  I think it was taken of an old stage set but as it was so unusual already, I thought I could alter it to make it into my House of Horrors!

It was really fun to create and I had to look far and wide to find bits and pieces which were small enough to use.  

If you are feeling mysterious or macabre (not sure that's good?!!) then why not see what you can come up with and join the challenge!

Keep an eye on the art in whatever you do ...   x

Tuesday, 4 October 2011

Beach Day


I love the beach! I'm drawn to shells, beach huts, mermaids and fish - in fact anything connected with the beach.

I recently ordered a beach house kit by Bella Creations and I decided to combine some of the elements from the kit with a seaside stamp set by Crafty Individuals and a few other bits and pieces from my stash.

I had a great time playing with all these lovely elements to create my very own beach scene for my beach babe to cool off in!

Thanks for taking the time to look. 

Happy crafting! x

After 39 ...


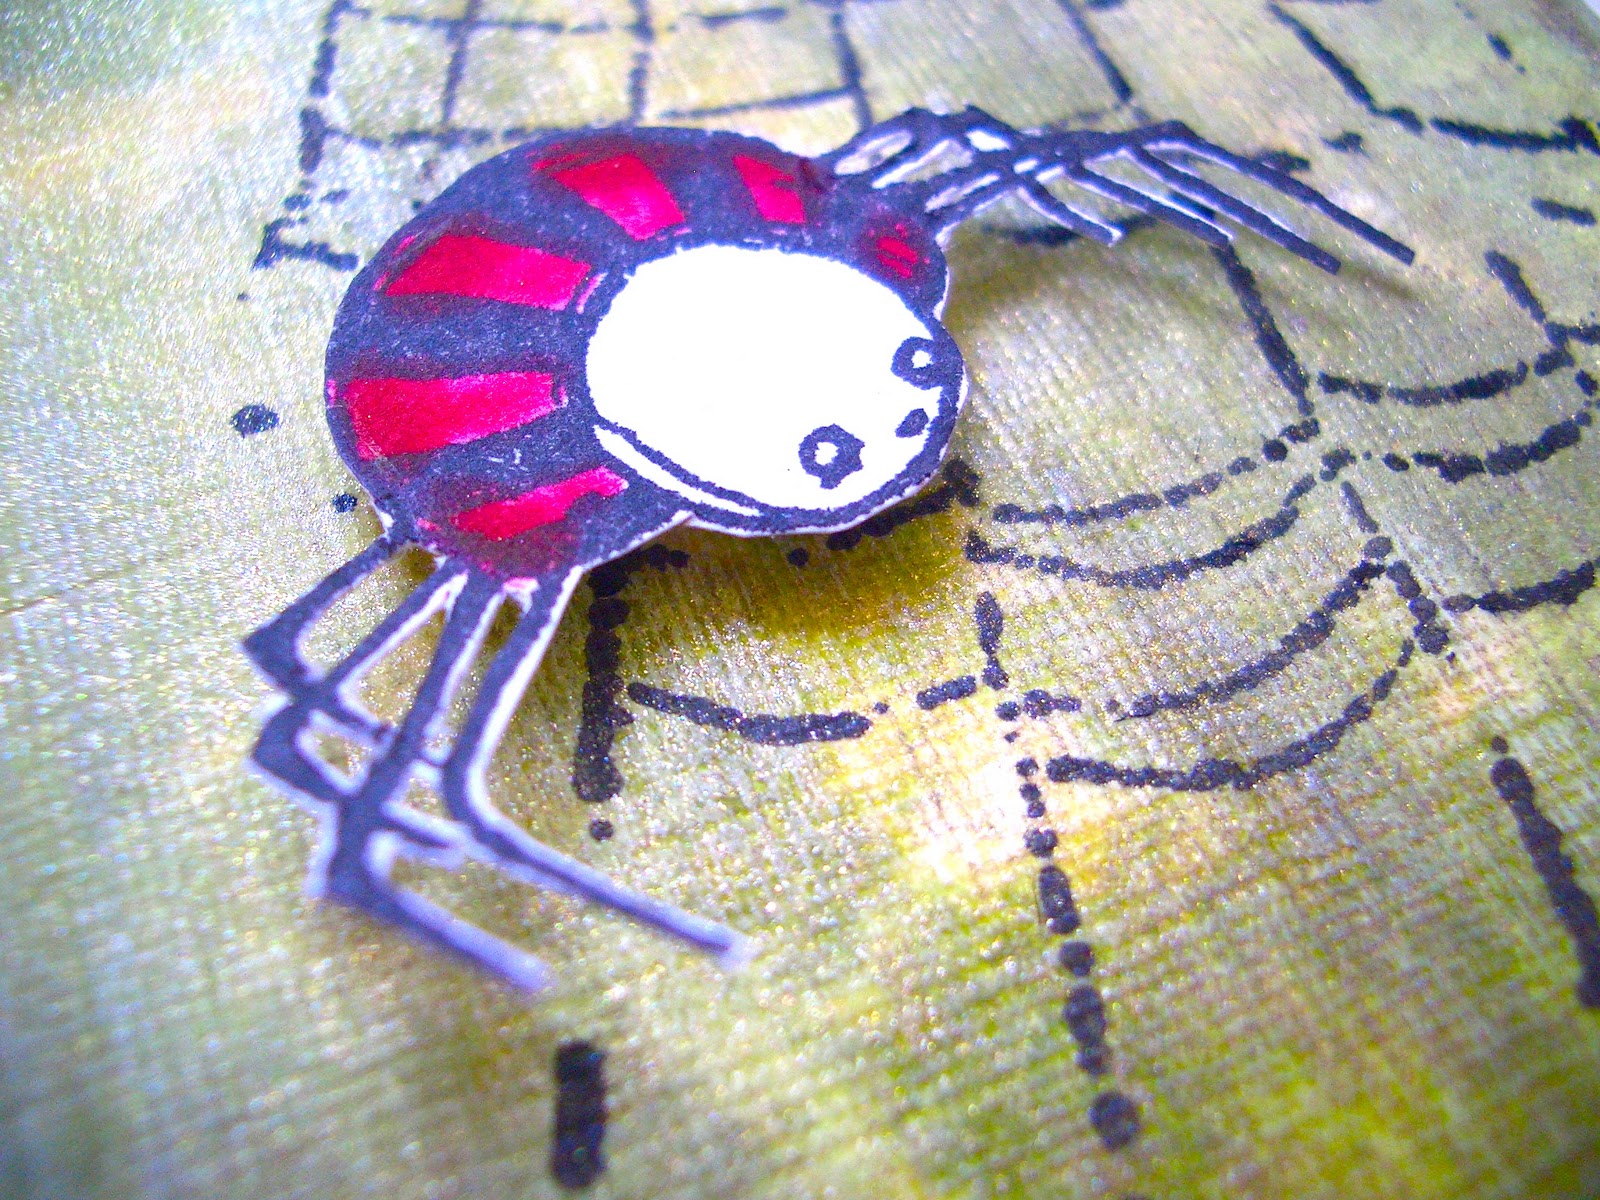
No, I'm not a fan of spiders either but Mr Stripes is way cute!

This is my entry for the challenge this week at the Stampotique Designers blog.  It is entitled SDC38 Humorous Birthday and is a stampotique only week so only their stamps are allowed.

I've had the web for some time but Mr Stripes arrived this week (he had been languishing on my wishlist!) so I wanted to get him out to play!
I created my background using alcohol inks first and then acrylic paints and perfect pearls mist in heirloom gold so it does have a shimmmer (hard to pick up with a camera!).

Thanks for visiting ... hope you all have an artful week.  x


Wednesday, 28 September 2011

Stand Side By Side ...


What a fabulous image!! 

When I saw it, it jumped out at me and I just LOVED it!!

Viva Las Vegas Stamps are our sponsor at Gingersnap Creations for all of September and this is one of their stamps.  This week it is a colour theme so no prizes for guessing the palette ... Blue, Turquoise and Purple.  I love those colours in combination so this was always going to be fun.

I built the background up with alcohol inks (which I am getting to love more and more) and then used acrylics with stencils and stamps.

Confession time comes next ... I intended to stamp my image in a very pale area I had built up and which I had blended to a perfect fade.  Disaster stuck however when my stamped image turned out imperfect :(   Well, it happens - so plan B swung into action and it all turned out good in the end.

If these colours appeal to you then why not put them together and join in the challenge - how you use them is up to you and we always love to see what everyone comes up with!
xx


Tuesday, 27 September 2011

Every Fish has an End!


I've created this for the CAS-ual Fridays challenge CFC21:  Create a Clean And Simple project using at least 3 shades of a monochromatic color (your choice) PLUS Brown. 

I haven't taken part in their challenges before but they are being sponsored by Stampotique and so I came across them from the Stampotique Designers Blog whose challenge I entered earlier today.


There is a tale to tell about this layout ... and it's a fishy one at that!


I was finishing up supper with the children when one of my boys started to recite some querky sayings/proverbs that he had obviously picked up today at school.  In the spirit of the conversation, I came out with a couple of quotes about crowns and life (taken directly from Stampotique).  His twin brother, not wishing to be outdone, and always one to think laterally said "Every Fish has an End!"  I just loved it.  Profound and Stupid at the same time so I decided to make it my page theme.


I used watercolours for the background and then acrylics for the bubbles, circles and shell.  I coloured the old music score with watercolours and pastels.


The fish are by Art Journey (so love them!) and they are also coloured with watercolours.

The journalling is created with an oil based paint marker but do NOT get me started on how much I loathe this pen.  I only bought it yesterday and it has given me nothing but trouble so I am seriously unimpressed with it's performance.  Back to the store tomorrow ...


I used pastels to create shadows - love pastels as they are just SO forgiving and easy to work with.


Hope you like it and hope CAS-ual Fridays do too.  Off to set this one live on the blog so about to find out either way ...

Thanks for looking.  Take Care and Be Artful x


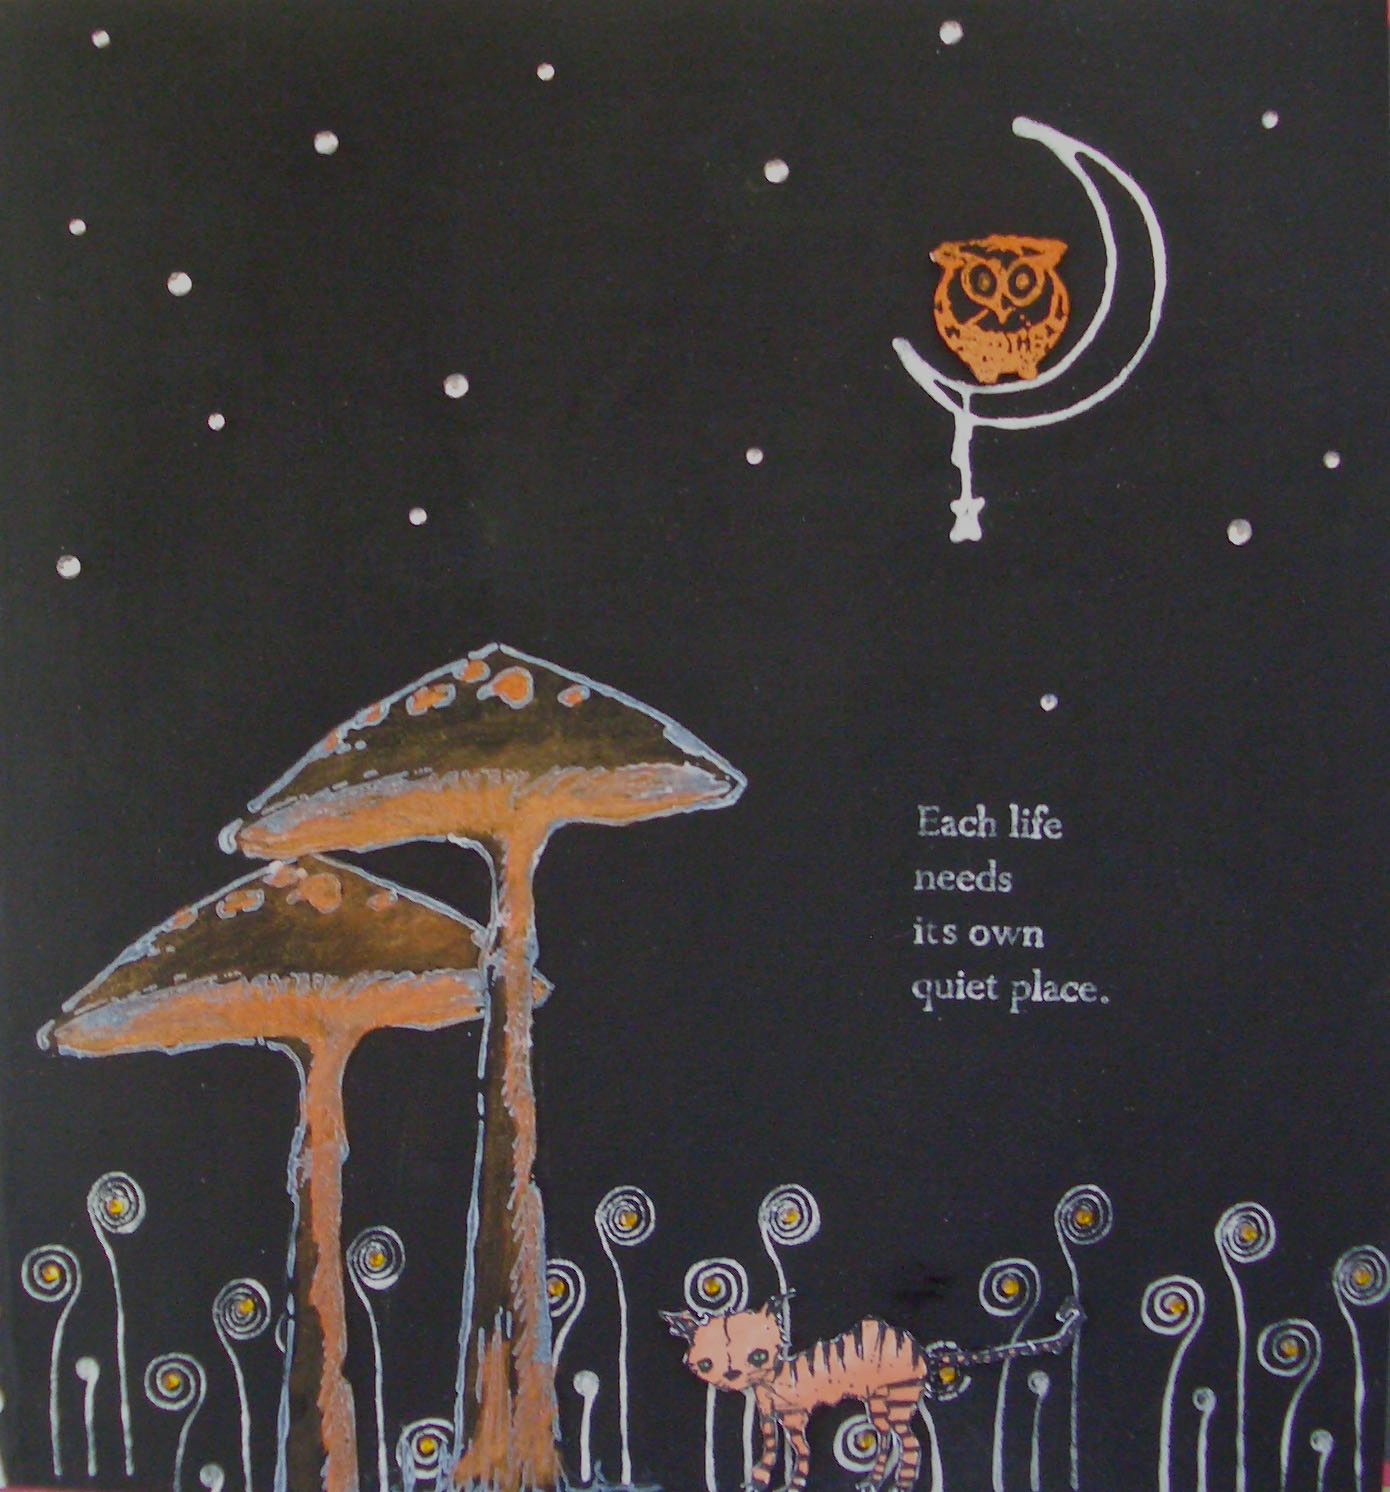
The Owl & the Pussy Cat ...


I decided to join the fun at the Stampotique Designers Challenge and this week is SDC38: Black, White and a HINT of color.

It is a free choice week so I didn't have to use Stampotique stamps but as they are so lovely, it's always a pleasure to use them.
I decided to reverse out my colours rather than go from white.  I used black gesso to create my background and then used a combination of white staz-on and interference paint in polar white to stamp my images.

It's hard to see on the photo but the toadstools and moon have a lovely sheen from the interference colours which work really well on dark backgrounds.

So, I shall post this on the challenge page and hope it gets a good response!

Have a great day and be artful in whatever you do ... x

Life


I just adore these  new stamps by Dylusions and I've used Dolally Doris for my new page.  There are quite a few ladies in the range so the more you own (wishful thinking!!) the more you can interchange them. 

I'm really enjoying my new art journalling journey and playing with various mediums to see how they work together.  The possibilities are so endless and I love getting messy with them all!!

I downloaded the border images from Tumblefish Studios and arranged them around the edge before doodling around the page.  I bought the birdcage peel-off during a recent trip to a craft shop and whilst I'm not a peel-off fan, I thought these were really cute.  I also got a sheet of brown owls, so they will be featuring soon in my work.

Thanks for looking ... take care  x

Wednesday, 21 September 2011

Shared Moments


We are very lucky this month at Gingersnap Creations to be sponsored by Viva Las Vegas Stamps.  They have probably the biggest range of stamps I have every come across and the image quality is absolutely second to none.

I couldn't resist this fabulous stamp of the gals on the beach for our challenge this week which is 'Shared Moments'.

I started with the stamped image and worked the page back from there.  The colour choice was driven by the beachy theme.  I used acrylic paints for the background and stencils and other household items to create my textures.

The border papers and bunting background are from Deviant Scrap.

The bunting is from a stamp set by Pink Persimmon.

I used my new pink typewriter (which always makes me smile!)  to create by journalling.

Hope you feel inspired to join the challenge and give us your take on your shared moments ...  x
 

Monday, 19 September 2011

Anybody there?


So I came up with the idea of using Gog Lin - the little goblin stamp which the children bought for me for Mother's Day earlier this year.

I decided to put him under a sea of large blooms which hopefully will appeal to my son's quirky sense of humour (I hope!)

I created the background on a piece of Tim Holtz paper which looked like an old ledger.  I wanted some of the text to still be visible to create a bit more interest so I used a large dry pastry brush (!) with very little paint and brushed the colours out very thinly.  I find pastry brushes great for certain techniques and they are really inexpensive to buy (especially compared to paint brushes). 


The title was stamped using an alphabet by Darkroom Door over which I stamped some script.  I used 3D silicone glue for my little man and my title. 

So that's the final card done ... just the cake to make and all the pressies to wrap -  and whoever thought triplets were going to be easy?!!!!!  xx


Birthday Greetings From Under the Sea


I love these mermaid stamps ... except for the cutting out part!  

This is my daughter's birthday card which I created using alcohol inks for the watery background.  I put a pearl layer over it which doesn't really show up in the photo but gives it a lovely sheen in real life.  I used acrylic paints and a stencil and bottle lids to create the circles.

The stamps for the top and bottom borders are also Stampotique.

So, that's two cards made and just one to go!  At the moment, I haven't got any ideas for the last one so better get my thinking cap on and quickly!!

x

Sunday, 18 September 2011

Rainbow Birds


I recently bought the Stampotique 'Strut Your Stuff' stamp.  One of my sons fell in love with it so I decided to give it it's first outing on his birthday card.  I love their stamps as they always give such a strong clear result and so my birds are strutting decisively across his card!!

I had an idea to give them all large rainbow plumes using alcohol ink which, after a few trial runs, turned out well.  I think they look like Indian Chiefs now which will make him laugh!

Hope you are all having a crafty time - the rain here in Dorset is fairly constant today so apart from stopping to feed my hungry monsters, I'm planning to craft all day - Yippee!  x


Wednesday, 14 September 2011

Eat Cake


So here we go with a new week and a new challenge ...  and this week over at Gingersnap Creations the theme is Crimpers.

I used corrugated card to cut my cupcake case which is really similar to those beautiful cases we all buy to fill and decorate when we get time to bake (which is not as often as I'd like).

This is my first art journal page and I really enjoyed playing.

I'm just getting into journalling although my creative time is very limited so progress is SLOW!  

Why not see what ideas you can think of to join in the crimping challenge - it will get your creative muse fired up!!  

x

Wednesday, 31 August 2011

Adorable


This is my heart coaster for this week's challenge at Gingersnap Creations.  It's a Blue Moon week so you can create anything from previous art exchange themes.  There's loads of choice - Party Postcards, Flower Forms, Soar ATC's, Paint Chip Scraplings, Winter 4x4, Coasting Hearts or Travel the World Bookmarks.  I chose to make a coaster and it was really fun to do.

I decided to make my whole coaster heart shaped (you can never have too many hearts!) and I embossed it an used a red stickle to emphasise the pattern.  The little butterfly boy is by Art Journal and the wings are by Tattered Angels.  I have had the wings in my stash for ages and have toyed with using them many times before but this project definitely needed to fly and so they have found their home!

Why not pop past Gingersnaps and join in the fun.  Have a crafty week whatever you do ...

x


Wednesday, 24 August 2011

Think Happy Thoughts!


The Joys of Childhood is our focus for this month at Gingersnap Creations and this week is a colour challenge of primary colours.  Stamping Boutique are sponsoring the whole month and the cute image has very kindly been donated by them.

I made the tree bough using grungeboard which I embossed and inked before adding some hand drawn knots.

I used floss to create the ropes which are extended over the bough. 

Thanks for visiting my blog ... hope you get chance to create your own primary colour layout and join in this week's fun!  x


Tuesday, 23 August 2011

Rabbit Hole


I've got a fascination with all things Alice and have been taking photos of rabbit burrows, leafy lanes and the like for some time in order to use some of my Alice stash!  

The cottage we rent in the Isle of Wight every October has a massive garden and if you venture to the very end where everything is rural and quiet, you will find hundreds of fabulous rabbit holes along the most exquisite leafy path.  Whilst the children play noisily on the trampoline, I venture down the garden to take photos of this secret world!

I made a frame for my old key from stampboard and backed it with music which I overstamped with flowers.  I used a clock mask and a botanicals mask to spritz my green paper with images using glimmer mists and dylysions ink sprays.  
The character cards are from Graphic45 paper and the  birdcage is by Dusty Attic.


Sunday, 21 August 2011

Love


I did a tutorial over at Gingersnap Creations on making stampboard frames for little treasures and this page was the basis for adding this frame. 

I created a little secret love message for my husband and popped it in a bottle.  I then added a little Vintaj brass tag with the has the word imagine stamped into it.

I created the background paper using alcohol inks and blending solution and I inked some shells onto it using a Crafters Workshop mask.

I inked up some watercolour paper with distress inks and then spritzed it with water and sprinkled rock salt over it.  After the paper dried, I brushed of the salt and was left with lovely watery patterns over my paper.  I used this in the centre of my page.
The tag was inked with distress and then I used molding paste in green, brown and yellow over the shell mask to make my nautilus shells.  The starfish was clear embossed before I inked the paper and then the embossing was removed with a hot iron to leave a flat white image. 


A quick pop to the beach to find mussel shells actually turned up the lovely razor shell (for which I always feel very privileged to be given by the sea) and which was fantastic for this page. 

I am really pleased with this project as sometimes using very dark shades of inks can be a bit scary (!) so this layout did take me a few days to get it to come together.  It's another one for my Isles of Scilly album which is now nearing completion (about time too!!).

If you want to know how to make the frames, use the link above to my tuturial where you can also find an earlier tutorial on how to use masks to create 3D images using molding paste.
Have a crafty day everyone ...  x


Wednesday, 17 August 2011

Teen Queen


Another completely different style for me as this month at Gingersnap Creations, we are concentrating on the Joys of Childhood.  Stamping Boutique have very generously sponsored this entire month and my Whimsy Teenager is one of their fantastic images which they have provided for us to play with.

She certainly is a cute girl and to I decided to sit her on some paper covered in kisses and hugs and add  some fantastic lips from a paper by Rusty Pickle's Cherry Pucker range entitled 'Chocolate Covered Cherries'. 

I fixed her with 3D glue to give the card dimension but this doesn't come out when photographing her from above so I'll have to leave that bit to your imagination!

So for everyone out there who has experience of a teen why not see what you can come up with and get crafting!  :)