Disclaimer

"Some of the products used on my blog may have been provided by the vendors mentioned in my posts."

Tuesday, 27 September 2011

Every Fish has an End!


I've created this for the CAS-ual Fridays challenge CFC21:  Create a Clean And Simple project using at least 3 shades of a monochromatic color (your choice) PLUS Brown. 

I haven't taken part in their challenges before but they are being sponsored by Stampotique and so I came across them from the Stampotique Designers Blog whose challenge I entered earlier today.


There is a tale to tell about this layout ... and it's a fishy one at that!


I was finishing up supper with the children when one of my boys started to recite some querky sayings/proverbs that he had obviously picked up today at school.  In the spirit of the conversation, I came out with a couple of quotes about crowns and life (taken directly from Stampotique).  His twin brother, not wishing to be outdone, and always one to think laterally said "Every Fish has an End!"  I just loved it.  Profound and Stupid at the same time so I decided to make it my page theme.


I used watercolours for the background and then acrylics for the bubbles, circles and shell.  I coloured the old music score with watercolours and pastels.


The fish are by Art Journey (so love them!) and they are also coloured with watercolours.

The journalling is created with an oil based paint marker but do NOT get me started on how much I loathe this pen.  I only bought it yesterday and it has given me nothing but trouble so I am seriously unimpressed with it's performance.  Back to the store tomorrow ...


I used pastels to create shadows - love pastels as they are just SO forgiving and easy to work with.


Hope you like it and hope CAS-ual Fridays do too.  Off to set this one live on the blog so about to find out either way ...

Thanks for looking.  Take Care and Be Artful x


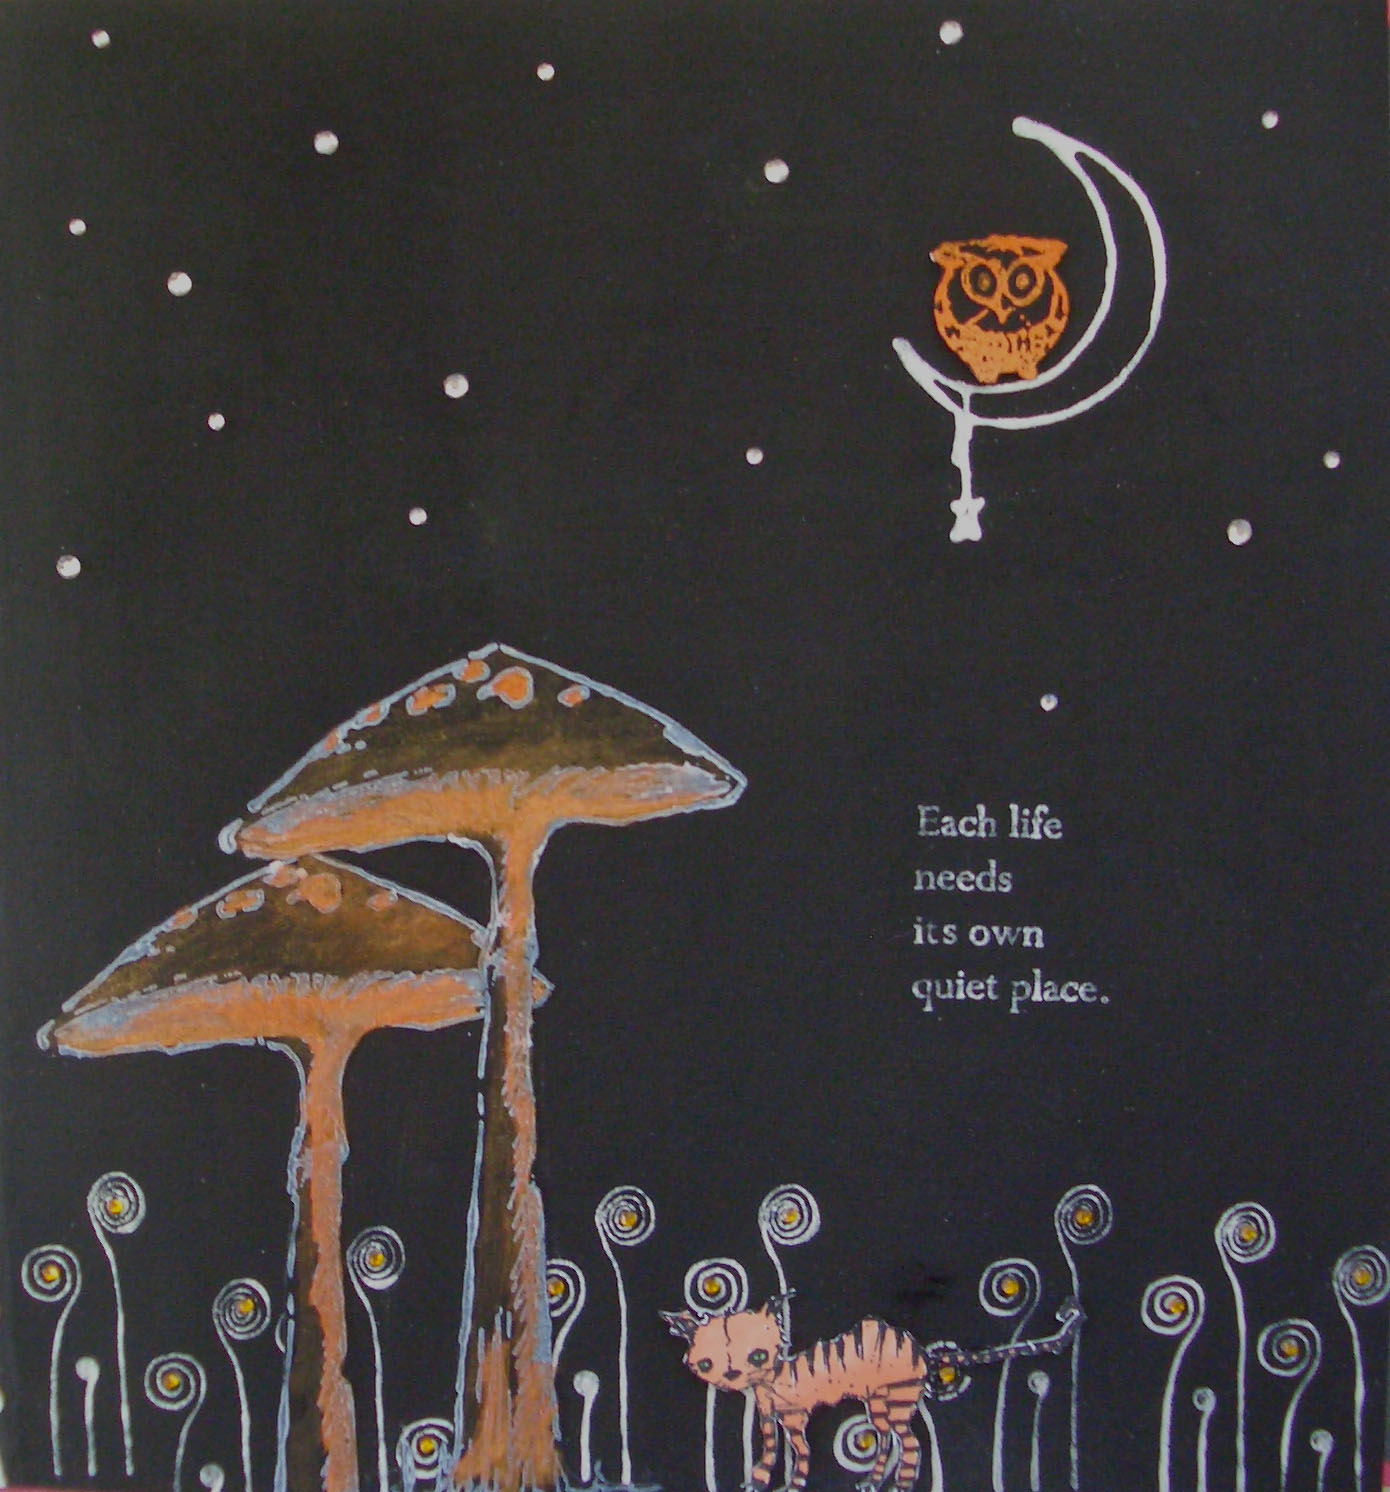
The Owl & the Pussy Cat ...


I decided to join the fun at the Stampotique Designers Challenge and this week is SDC38: Black, White and a HINT of color.

It is a free choice week so I didn't have to use Stampotique stamps but as they are so lovely, it's always a pleasure to use them.
I decided to reverse out my colours rather than go from white.  I used black gesso to create my background and then used a combination of white staz-on and interference paint in polar white to stamp my images.

It's hard to see on the photo but the toadstools and moon have a lovely sheen from the interference colours which work really well on dark backgrounds.

So, I shall post this on the challenge page and hope it gets a good response!

Have a great day and be artful in whatever you do ... x

Life


I just adore these  new stamps by Dylusions and I've used Dolally Doris for my new page.  There are quite a few ladies in the range so the more you own (wishful thinking!!) the more you can interchange them. 

I'm really enjoying my new art journalling journey and playing with various mediums to see how they work together.  The possibilities are so endless and I love getting messy with them all!!

I downloaded the border images from Tumblefish Studios and arranged them around the edge before doodling around the page.  I bought the birdcage peel-off during a recent trip to a craft shop and whilst I'm not a peel-off fan, I thought these were really cute.  I also got a sheet of brown owls, so they will be featuring soon in my work.

Thanks for looking ... take care  x

Wednesday, 21 September 2011

Shared Moments


We are very lucky this month at Gingersnap Creations to be sponsored by Viva Las Vegas Stamps.  They have probably the biggest range of stamps I have every come across and the image quality is absolutely second to none.

I couldn't resist this fabulous stamp of the gals on the beach for our challenge this week which is 'Shared Moments'.

I started with the stamped image and worked the page back from there.  The colour choice was driven by the beachy theme.  I used acrylic paints for the background and stencils and other household items to create my textures.

The border papers and bunting background are from Deviant Scrap.

The bunting is from a stamp set by Pink Persimmon.

I used my new pink typewriter (which always makes me smile!)  to create by journalling.

Hope you feel inspired to join the challenge and give us your take on your shared moments ...  x
 

Monday, 19 September 2011

Anybody there?


So I came up with the idea of using Gog Lin - the little goblin stamp which the children bought for me for Mother's Day earlier this year.

I decided to put him under a sea of large blooms which hopefully will appeal to my son's quirky sense of humour (I hope!)

I created the background on a piece of Tim Holtz paper which looked like an old ledger.  I wanted some of the text to still be visible to create a bit more interest so I used a large dry pastry brush (!) with very little paint and brushed the colours out very thinly.  I find pastry brushes great for certain techniques and they are really inexpensive to buy (especially compared to paint brushes). 


The title was stamped using an alphabet by Darkroom Door over which I stamped some script.  I used 3D silicone glue for my little man and my title. 

So that's the final card done ... just the cake to make and all the pressies to wrap -  and whoever thought triplets were going to be easy?!!!!!  xx


Birthday Greetings From Under the Sea


I love these mermaid stamps ... except for the cutting out part!  

This is my daughter's birthday card which I created using alcohol inks for the watery background.  I put a pearl layer over it which doesn't really show up in the photo but gives it a lovely sheen in real life.  I used acrylic paints and a stencil and bottle lids to create the circles.

The stamps for the top and bottom borders are also Stampotique.

So, that's two cards made and just one to go!  At the moment, I haven't got any ideas for the last one so better get my thinking cap on and quickly!!

x

Sunday, 18 September 2011

Rainbow Birds


I recently bought the Stampotique 'Strut Your Stuff' stamp.  One of my sons fell in love with it so I decided to give it it's first outing on his birthday card.  I love their stamps as they always give such a strong clear result and so my birds are strutting decisively across his card!!

I had an idea to give them all large rainbow plumes using alcohol ink which, after a few trial runs, turned out well.  I think they look like Indian Chiefs now which will make him laugh!

Hope you are all having a crafty time - the rain here in Dorset is fairly constant today so apart from stopping to feed my hungry monsters, I'm planning to craft all day - Yippee!  x


Wednesday, 14 September 2011

Eat Cake


So here we go with a new week and a new challenge ...  and this week over at Gingersnap Creations the theme is Crimpers.

I used corrugated card to cut my cupcake case which is really similar to those beautiful cases we all buy to fill and decorate when we get time to bake (which is not as often as I'd like).

This is my first art journal page and I really enjoyed playing.

I'm just getting into journalling although my creative time is very limited so progress is SLOW!  

Why not see what ideas you can think of to join in the crimping challenge - it will get your creative muse fired up!!  

x

Wednesday, 31 August 2011

Adorable


This is my heart coaster for this week's challenge at Gingersnap Creations.  It's a Blue Moon week so you can create anything from previous art exchange themes.  There's loads of choice - Party Postcards, Flower Forms, Soar ATC's, Paint Chip Scraplings, Winter 4x4, Coasting Hearts or Travel the World Bookmarks.  I chose to make a coaster and it was really fun to do.

I decided to make my whole coaster heart shaped (you can never have too many hearts!) and I embossed it an used a red stickle to emphasise the pattern.  The little butterfly boy is by Art Journal and the wings are by Tattered Angels.  I have had the wings in my stash for ages and have toyed with using them many times before but this project definitely needed to fly and so they have found their home!

Why not pop past Gingersnaps and join in the fun.  Have a crafty week whatever you do ...

x


Wednesday, 24 August 2011

Think Happy Thoughts!


The Joys of Childhood is our focus for this month at Gingersnap Creations and this week is a colour challenge of primary colours.  Stamping Boutique are sponsoring the whole month and the cute image has very kindly been donated by them.

I made the tree bough using grungeboard which I embossed and inked before adding some hand drawn knots.

I used floss to create the ropes which are extended over the bough. 

Thanks for visiting my blog ... hope you get chance to create your own primary colour layout and join in this week's fun!  x


Tuesday, 23 August 2011

Rabbit Hole


I've got a fascination with all things Alice and have been taking photos of rabbit burrows, leafy lanes and the like for some time in order to use some of my Alice stash!  

The cottage we rent in the Isle of Wight every October has a massive garden and if you venture to the very end where everything is rural and quiet, you will find hundreds of fabulous rabbit holes along the most exquisite leafy path.  Whilst the children play noisily on the trampoline, I venture down the garden to take photos of this secret world!

I made a frame for my old key from stampboard and backed it with music which I overstamped with flowers.  I used a clock mask and a botanicals mask to spritz my green paper with images using glimmer mists and dylysions ink sprays.  
The character cards are from Graphic45 paper and the  birdcage is by Dusty Attic.


Sunday, 21 August 2011

Love


I did a tutorial over at Gingersnap Creations on making stampboard frames for little treasures and this page was the basis for adding this frame. 

I created a little secret love message for my husband and popped it in a bottle.  I then added a little Vintaj brass tag with the has the word imagine stamped into it.

I created the background paper using alcohol inks and blending solution and I inked some shells onto it using a Crafters Workshop mask.

I inked up some watercolour paper with distress inks and then spritzed it with water and sprinkled rock salt over it.  After the paper dried, I brushed of the salt and was left with lovely watery patterns over my paper.  I used this in the centre of my page.
The tag was inked with distress and then I used molding paste in green, brown and yellow over the shell mask to make my nautilus shells.  The starfish was clear embossed before I inked the paper and then the embossing was removed with a hot iron to leave a flat white image. 


A quick pop to the beach to find mussel shells actually turned up the lovely razor shell (for which I always feel very privileged to be given by the sea) and which was fantastic for this page. 

I am really pleased with this project as sometimes using very dark shades of inks can be a bit scary (!) so this layout did take me a few days to get it to come together.  It's another one for my Isles of Scilly album which is now nearing completion (about time too!!).

If you want to know how to make the frames, use the link above to my tuturial where you can also find an earlier tutorial on how to use masks to create 3D images using molding paste.
Have a crafty day everyone ...  x


Wednesday, 17 August 2011

Teen Queen


Another completely different style for me as this month at Gingersnap Creations, we are concentrating on the Joys of Childhood.  Stamping Boutique have very generously sponsored this entire month and my Whimsy Teenager is one of their fantastic images which they have provided for us to play with.

She certainly is a cute girl and to I decided to sit her on some paper covered in kisses and hugs and add  some fantastic lips from a paper by Rusty Pickle's Cherry Pucker range entitled 'Chocolate Covered Cherries'. 

I fixed her with 3D glue to give the card dimension but this doesn't come out when photographing her from above so I'll have to leave that bit to your imagination!

So for everyone out there who has experience of a teen why not see what you can come up with and get crafting!  :)


Wednesday, 3 August 2011

Max


This month at Gingersnap Creations, we are concentrating on the Joys of Childhood and this week's challenge is G113 Babes and Tots.

I had a great photo in mind for this challenge of all my tribe in the bath with squirty soap on their heads but I'm a bit lacking in bathroom themed stamps so instead, I've opted for some shots of my little boy (now aged 13) on the beach.  Funny how they don't really change isn't it?  Still happy to pose for the camera and still got a ready smile ... well at least some of the time anyway!

My background paper was white linen and I used a combination of glimmer sprays and a Crafter's Workshop template (mini seashells) to create the seaside effect.  The palm tree, stamp and crab are all from Tattered Angels beach screen prints stamps.

I created the title using a technique shown to me at the Tim Holtz workshop I went to back in February.  I painted grungeboard squares with black paint dabbers and inked the grungeboard latters with Vintage Photo.  I adhered the 2 parts to make faux ink blocks which I think look really cool.

A starfish in the corner completed the page along with a little dusty concord and faded jeans distress around the edge of the page.

This is a really great challenge to enter as it is a wide category giving you plenty of scope so I hope you feel inspired to dig out some old photos and head on up to the challenge!!!  

Happy crafting :)

Wednesday, 27 July 2011

Geevor Tin Mine


This is a page I have made for this week's challenge at Gingersnap Creations where we are focusing on steampunk all month.  We are very kindly sponsored this month by Dezinaworld and some of the images I have used in this piece were donated by them.   The title of the challenge is GC112 Iron, leather and Brass.

In one of my earlier posts, following my first foray into trying out steampunk, I said that I hoped to scrap my photos of our recent trip to the Tin Mine in Cornwall in a this style.  I hadn't realised when I said this, that I would get an opportunity to do so this quickly!  

A good friend of mine recently sent me the fabulous die cut clock which she has designed and cut out on a Pazzles machines.  It has sat on my desk for a week while I decided where to use it and then this layout sprang to mind.  

I inked the corners of my paper, which is by Pink Paislee, with distress inks to highlight the gorgeous damask masking.  I printed and cut out the cogs from a collage sheet by Dezinaworld and altered the large cog to make it a more open style gear.  I coupled these images with real cogs from old watches.

I cut my Victorian gent from a tag collage sheet, also by Dezinaworld and used more old watch parts to dress him in a steampunk style.  The moths and tiny dragonflies were stamped with Pumice Stone distress ink.

I created my title sign from grungeboard which I inked with distress ink and then dried with a heat gun.  I then re-inked it with Versamark and coated it with UTEE which I heated until it started to bead and then stopped.  This gives a faux leather effect which is hard to pick up with the camera but it really an easy and impressive technique which I would recommend everyone to try.  Tim Holtz (who else could have dreamed this up?) is the master behind this technique and there are several u-tube videos on it if you would like to see a clip.


My letters were cut on my cricut machine in dark grey cardstock to match the clock.  However, I had not thought through the faux leather colour and soon realised they would need to be pale to show up.  I decided to ink them with VersaMagic White and clear emboss them.  I was really pleased with the result as they actually look like tin - result! 

I ran them through my Xyron Quick Sticker but found that they wouldn't adhere to the faux leather finish. so some fiddly gluing was required!  


I am really happy with this page as it has all come together really well (hope you agree!) and it was fun.  It was a great place to visit and I had lots of great shots which I wanted to use.  Best of all, my friend who provided the clock for me lives about a mile from the mine so my page has a great local connection.


Happy crafting everyone! x

Thursday, 21 July 2011

Timeless Seas


I'm taking part in a postcard exchange which is going to run for the next 14 months.  This is my first card and is on it's way to Jeanie in the US (hope you like it Jeanie!).

Whoever is the recipient for the month gets to choose the theme or they can leave it as a free choice.  Jeanie has left it to each of us to decide and seeing all the cards that have been made and the variety is fantastic. 

I decided to indulge my passion for fish and clocks and do a sea theme using some new stamps by Chapel Road. They are beautiful as they look like real fish fossilized into stone and stamp beautifully.

I embossed the single fish onto the background and then inked all over it.  I stamped and cut out one fish and covered him with black UTEE and pale green crystals. I stamped the tag with the clock and then put all the elements together and added a couple of small shells which I hope will survive the mail!

These postcard sized pieces of art are really fun to create so I think I'm going to enjoy being part of this exchange.  :)

Wednesday, 20 July 2011

Smile & Wave!


Oh the fun I had with this page!  

The challenge this week at Gingersnap Creations is continuing with machinery and steampunk and is GC111 Trains and Planes.  Dezinaworld are very kindly sponsoring all the July challenges at Gingersnap and my airship image was donated by them.

A few months ago I bought two old volumes entitled 'General Knowledge Illustrated' from a secondhand book shop for £5.  They have lots of black and white image plates in them which I knew would come in useful for loads of projects and this fantastic background image is a prime example.

Once I had found it and decided to use the image of the couple on the 'airship' (can I call it that?!), so many funny conversations came to mind that that hardest part of creating my project was deciding that that couple would be saying to one another!

I studied the faces of my vintage couple.  The man is smoking on his pipe and waving, quite happy with his situation whilst his lady friend is looking rather more concerned at where they are.  By positioning them in a sky filled by a  plane being re-fuelled mid-air seemed the only appropriate course of action!!

I printed my image onto acetate and used an vintage typewriter (another recent purchase) to add the conversation which reads 

"SMILE & WAVE!" 
But suddenly taking to the sky in his marvellous flying machine seemed a little foolhardy ...


I used an embossing folder for the backing sheet and also for the cogs and I applied silver metallic rub-on to hightlight the texture.

One of my faster projects which I hope brings a smile to your face and encourages you to join us for the challenge. x

Wednesday, 13 July 2011

Escaping the Machine


This week the challenge over at Gingersnap Creations is GC110 Gears, Cogs and Watch Bits.  The whole of July's challenges are being very kindly sponsored by Dezinaworld and some of the imagery I've used has been donated by them for this project.

I bought my background machine image from a secondhand book shop which sells plates from old books.  I cut it out and then used an the steampunk alterations die to create my cogs.  I used black UTEE on them all and sprinkled a little embossing powder into the last layer.

I used the mini gears from the movers and shapers alterations die set to cut some further cogs in metal and metal mesh.

The wording is from a dymo machine and the winged wheel is by The Artistic Stamper.

I haven't done a steampunk layout before although I've always loved the style so this was fun to do.  I've got some photos of old mining equipment to scrap and I'm going to attempt to use a steampunk style on them.  If this turns out OK, I'll add it to the blog ... 

Hope this inspires you to join the challenge! Have a crafty weekend! x

Sunday, 10 July 2011

Tresco


This is another page for my Isles of Scilly album.

For this page, I printed my photo onto canvas and distressed the edges before fixing it to the paper.  I then tinted some Golden Molding Paste with acrylic paint before blending the edges of my picture into the background paper.  

 
Once the paste was dry, I created some more coloured pastes using inks and used them with various flower stamps to create textured blooms.  The best stamps for this technique are those which are deep cut and mounted onto wood such as the fabulous alium which is by The English Stamp Company and is one of my all-time favourites!  Once these dried, I stamped some flat images to finish the bottom of the page.

The branch and birds at the top were also created using molding paste and a Crafters Companion stencil.  

The title letters were painted with acrylic paints and some tinted glass bead gel.  The hanging tag is made using Vintaj brass elements.

Saturday, 9 July 2011

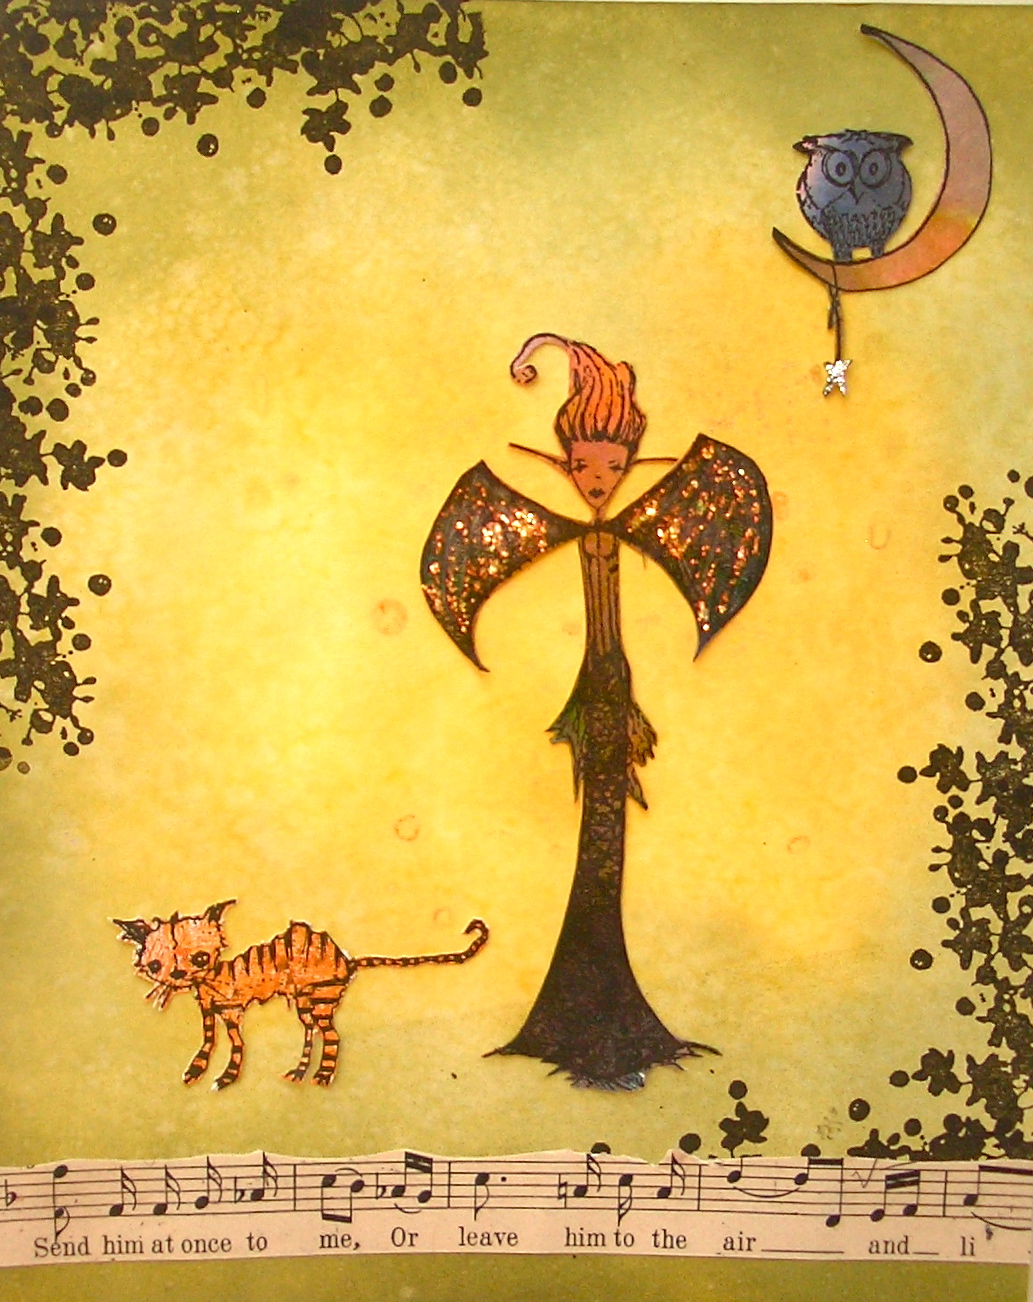
Send Him at Once to Me ...


This is my entry for the Stampotique Designers Challenge SDC33 Use Your Scraps.  There was a blog hop tour attached to this challenge with some prizes up for grabs but  I've been too busy to get my entry done in time for that!

Like most crafters, I've got tons of scraps.  Actually, due to moving house, I have thrown away some stuff (shame on me!!) and since moving, due to my new craft area being visible to all rather than being tucked away in the annexe, I have been throwing more bits and pieces away just to keep the area tidier!  However, suffice it to say, I still had more than enough stuff for this challenge LOL!!

As I started to rummage, I found some sheets of paper that I had used to experiment with some inky techniques.  I chose a piece for my background which was created with inks, water and rock salt and was languishing in the bottom of the bits box.  I then found another sheet which I had used lots of different inks on and then masked and sprayed with glimmer mists.  It had loads of different colours on it so I stamped my images in different areas before cutting them out.  I cut Kitty out from a sheet where the technique I had tried didn't go to plan (and I've a good choice of those!).

I was deciding on the sentiment when I chanced upon a leftover piece of sheet music which seemed to lend itself to my layout.  Job Done!

Hope you like my scraps entry -  if you are quick you could use us some of your scraps too as the challenge runs until 12th July.

Have a crafty weekend!! x